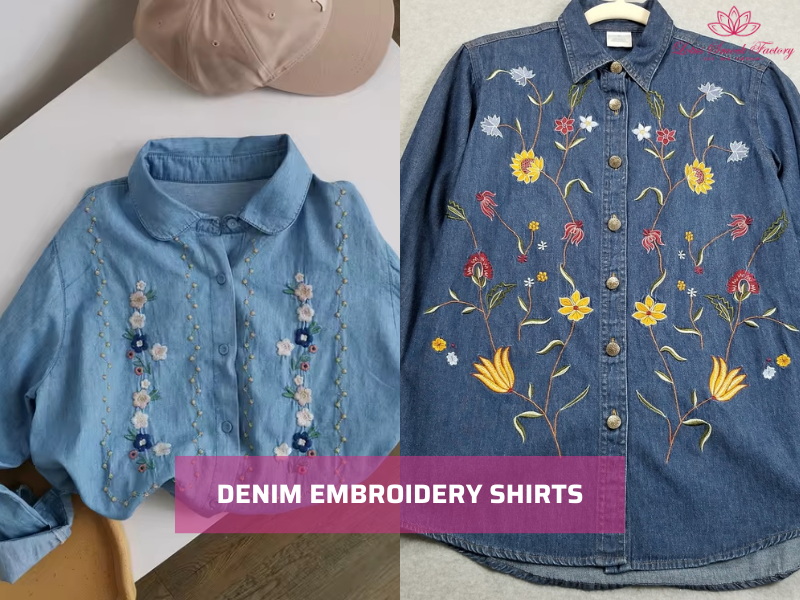
How to Embroider on Denim: A Complete Guide for Beginners & DIY Fashion Makers
Can I embroider on denim? Yes, you can easily make your jeans, jackets, or bags more special by stitching decorative patterns. It’s Denim is thicker than most fabrics, so you need the right tools, stitches, and stabilisers to get smooth results. Many beginners struggle with broken needles, puckering fabric, or uneven stitches, but these problems are easy to solve with the right steps.
In this guide, you will learn how to embroider on denim by hand and machine, fix common issues, and explore creative ideas for fashion and DIY projects.
1. Why Denim Embroidery Is Popular Today.
Embroidering special patterns like flowers or monograms on denim is part of a wider trend in fashion and DIY projects. Denim is durable and easy to repurpose, which makes it a favorite fabric for embroidery. There are several reasons why it has become popular again.
- Personalized Clothing
More people want to personalise clothing at home. Embroidery on denim gives you a way to refresh old jeans or jackets instead of throwing them away.
- Boutique and resale value
Small shops and online sellers often add embroidery to denim before resale. Hand-stitched details allow them to sell basic denim items at a premium price.
- Versatility across denim items
You can embroider on many denim products. Jeans, jackets, skirts, and tote bags all work well with hand or machine embroidery. Each piece offers space for creative motifs.
In short, denim embroidery is popular because it combines creativity, resale value, and sustainability. Whether you want to upgrade your old jeans or create boutique products, embroidery on denim offers both style and purpose.
2. Tools and Materials You Need for Embroidery on Denim
The right tools make learning how to embroider on denim easier and prevent common problems like broken needles or puckered fabric. Follow the tools and materials table below:
| Category | Tools & Options | Quantity / Notes |
| Needles | – Hand embroidery: sharp embroidery needles (sizes 5–9).
– Machine embroidery: denim needle size 90/14 or sharp embroidery needle. |
Keep 3–5 needles ready.
Switch if one bends or breaks. |
| Threads | – Embroidery floss (cotton, 6-strand; split into 2–3 strands for fine work).
– Polyester thread (strong and colourfast, ideal for machine use). – Cotton thread for a matte finish. |
For practice, prepare 2–3 skeins of floss or one 500 m spool of polyester thread. |
| Hoops | – Sturdy wooden or plastic hoop (15–20 cm).
– Must hold denim tight but not overstretch it. |
One hoop is enough. Choose a smaller size for pockets and a larger one for jackets or tote bags. |
| Stabilisers | – Cut-away stabiliser for dense designs or machine work.
– Tear-away stabiliser for lighter motifs. – Hand embroidery may skip stabiliser unless fabric is very thin. |
Cut 20 × 20 cm pieces for each design area. One pack of 25 sheets covers several projects. |
| Other Essentials | – Fabric marker or chalk for design placement.
– Small sharp embroidery scissors (curved tips for close trimming). – Thimble to push needle through thick seams. |
One marker, one pair of scissors, and one thimble are enough for most projects. |
Expert Tip: You should test a small section first. Check stitch density, tension, and colour contrast before starting your final design. This step saves time and prevents mistakes on your main denim piece.
3. How to Embroider on Denim by Hand: 5 Easy Steps
Hand embroidery on denim takes more effort than on softer fabrics, but the results are durable and stylish. Follow these five steps to prepare, stitch, and finish your project.
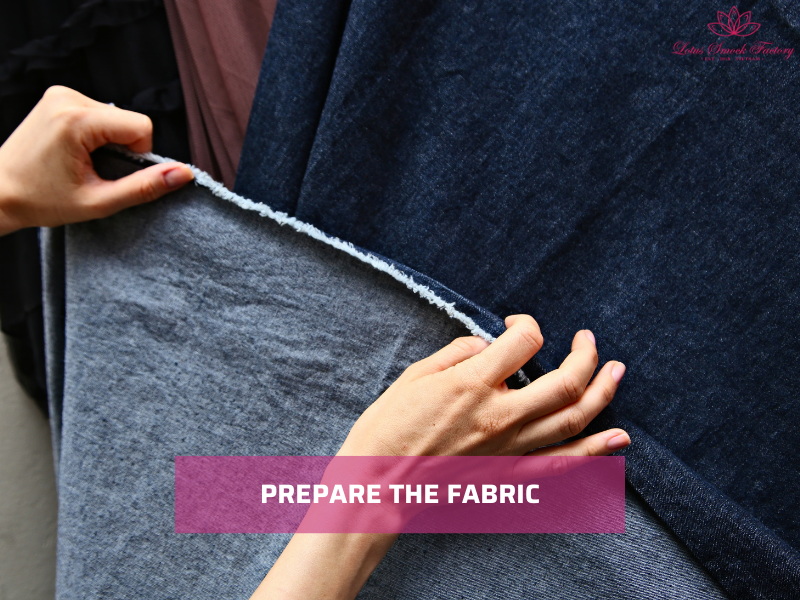
3.1. Step 1: Prepare the Fabric
You need to start with clean and smooth denim before stitching.
- Wash the denim to remove dust, sizing, or oils.
- Iron the fabric to flatten wrinkles and make the surface easier to work on.
- Place the fabric in a sturdy hoop. Keep it taut but do not overstretch, as denim can lose shape if pulled too tightly.
3.2. Step 2: Transfer Your Design
Then, you need to transfer your design clearly so stitches stay aligned.
- Use fabric pens, chalk, or tracing paper to mark your design.
- Try water-soluble stabilisers if you want guidelines that wash away after stitching.
- Choose simple motifs if you are a beginner. Popular choices include flowers, leaves, and initials
- Keep the design size suitable for the area. Small motifs work best on pockets or cuffs, while larger patterns fit the back of a jacket.
=>>> See our tutorials on how to embroider flowers and how to embroider a leaf for extra inspiration.
3.3. Step 3: Choose the Right Stitch
Now, you select stitches that work well with the thickness of denim.
- Backstitch: clean lines for outlines or lettering.
- Satin stitch: solid fills for bold areas.
- Chain stitch: textured lines for vines or borders.
- Detached chain (lazy daisy): simple petals or leaves.
Tips: Mixing these stitches lets you add both structure and texture to your designs.
3.4. Step 4: Start Stitching
You can now begin stitching your design onto the denim.
- Use short thread lengths of 40–50 cm. Long threads are more likely to knot or fray on heavy fabric.
- Thread your needle securely and bring it up from the back of the denim. Follow your marked design slowly.
- Keep your thread ends neat. Secure them under the first few stitches to avoid lumps on the back of the fabric.
- Work with steady tension. Pulling too tight may cause puckering, while loose stitches may snag.
- Secure thread ends neatly as you work to prevent lumps or uneven surfaces.
3.5. Step 5: Finish and Secure
Lastly, after stitching, you must finish properly so the design lasts and looks neat.
- When you finish a section, knot the thread securely on the back. Weave the ends under nearby stitches to keep them in place.
- Trim the thread close to the fabric for a clean look.
- For extra comfort and durability, especially on jackets or bags, line the inside of the denim with a piece of light fabric. This covers the back of the embroidery and protects the stitches.
4. Step-by-Step: How to Embroider on Denim with a Machine
Machine embroidery on denim is faster and more consistent than hand work, but denim’s thickness requires extra preparation. Follow these four steps to get clean, long-lasting results.
4.1. Step 1: Hoop the Denim with Stabilizer
First, you need to stabilise denim before stitching to prevent puckering and shifting.
- Use a cut-away stabiliser for strong support and durability. It stays on the back after stitching and holds the design in place.
- For thick jackets or seams that won’t fit into a hoop, try the “float” method. Spray adhesive on the stabiliser, then place the denim on top without hooping. This keeps the fabric steady during stitching.
- Always cut stabiliser larger than your design area to provide full coverage.
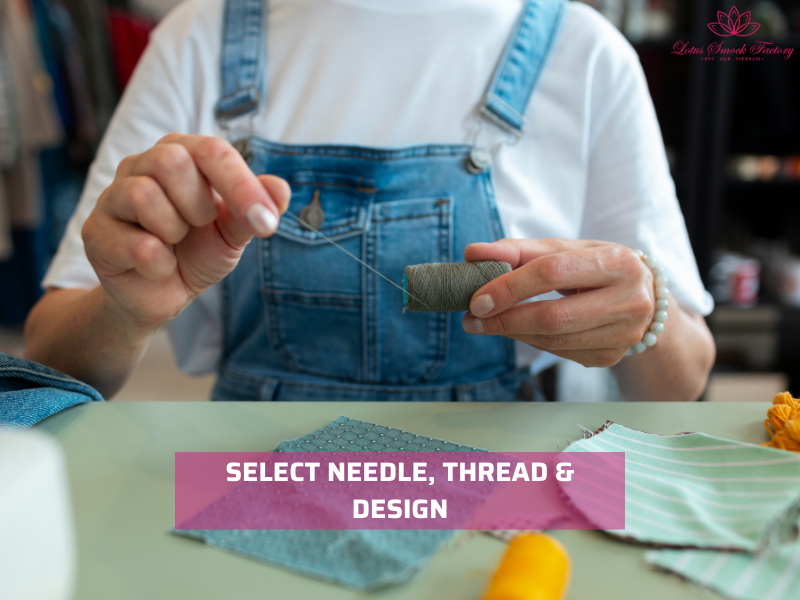
4.2. Step 2: Select Needle, Thread & Design
Then you choose tools and designs that work best for heavy fabric.
- Use a sharp 90/14 embroidery or denim needle. This size pierces thick layers without breaking.
- Select polyester or cotton embroidery thread. Polyester is stronger and resists fraying, while cotton gives a matte look that blends with denim.
- Pick designs with lower stitch density. High-density designs make denim stiff and uncomfortable, while lighter patterns sit more naturally on the fabric.
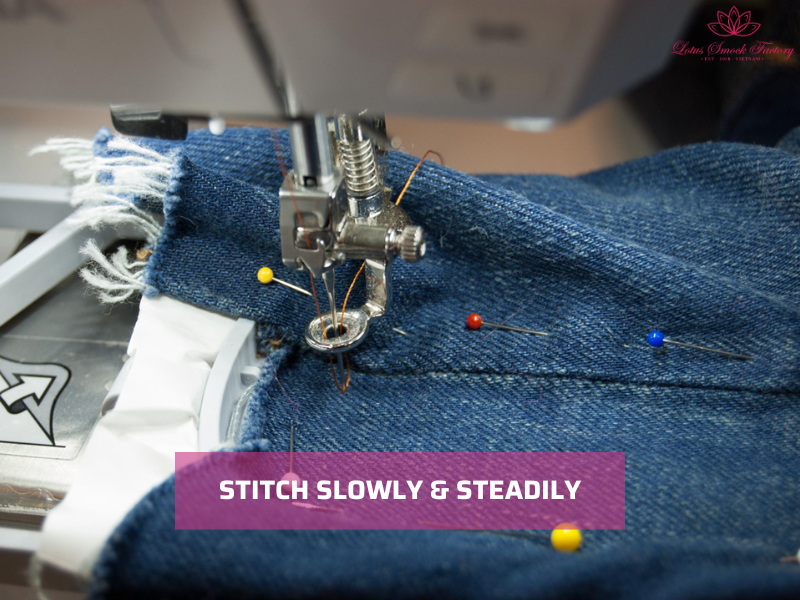
4.3. Step 3: Stitch Slowly & Steadily
You now start the embroidery process, adjusting speed and tension for denim.
- Reduce the machine speed to medium. Slower stitching avoids needle breaks and keeps stitches smooth.
- Keep stitches light and steady to prevent puckering or pulling the fabric.
- Stay close to the machine. Monitor thread tension and trim loose jump stitches as you go.
4.4. Step 4: Finish & Trim
After stitching, you must finish carefully so the design looks clean and lasts longer.
- Remove the hoop and trim any excess stabiliser around the design. Leave enough backing for support, especially on large motifs.
- Check both front and back for loose threads and trim them neatly with small scissors.
- Press the embroidery gently from the back. Place a pressing cloth between the iron and fabric to protect the stitches.
- The Difference of Hand vs Machine Embroidery
When learning how to embroider on denim, you can choose between hand embroidery and machine embroidery. Both methods have advantages and limits. The table below shows the main differences.
| Feature | Hand Embroidery on Denim | Machine Embroidery on Denim |
| Look & Style | Organic, artistic, and one-of-a-kind. Small variations add character. | Consistent and precise. Every design looks the same. |
| Detail | Allows intricate stitches and delicate textures. Great for flowers, initials, and custom motifs. | Best for bold designs and logos. Fine detail may look less natural. |
| Texture & Feel | Softer finish with visible thread work. Adds a handmade touch. | Smoother, flatter finish. Can feel more commercial. |
| Time & Effort | Slow and labour-intensive. Best for small or personal projects. | Fast and efficient. Suitable for bulk or business use. |
| Skill Level | Requires patience and practice to master stitches. | Requires machine setup knowledge but less manual skill. |
| Cost | Low cost to start. Needs only needles, thread, hoop, and stabiliser. | Higher cost. Needs an embroidery machine, cap hoop, and stabilisers. |
| Best Use | Personal DIY fashion, upcycling, and boutique customisation. | Branded products, mass production, and consistent resale. |
Summary: Hand embroidery is ideal for personalised and detailed work, while machine embroidery suits business, speed, and uniform designs.

6. Troubleshooting Denim Embroidery Problems
Denim is thicker than most fabrics, so embroidery can bring extra challenges. If you want to embroider on denim without frustration, here are common problems and how to fix them.
Fabric puckering
Puckering happens when denim pulls or wrinkles around the stitches. This is usually caused by loose hooping or wrong tension.
⇒ You tighten the hoop so the fabric is firm but not overstretched. Adjust machine tension or hand stitching tension until the stitches sit flat.
Needle breaking
Denim is dense, and regular needles may snap when they hit thick seams.
⇒ Fix it by using a sharp embroidery or denim needle. For machines, size 90/14 works well. For hand embroidery, use a sharp embroidery needle that can handle heavy fabric.
Thread fraying
Threads can split or wear out because denim creates friction with every pass.
⇒ You should use shorter thread lengths, about 40–50 cm. If using hand embroidery floss, condition it with wax or thread conditioner to reduce fraying.
Uneven stitches
Stitches may look irregular or too tight in some areas. This often comes from working without enough support.
⇒ To solve it, you add a stabiliser. Cut-away or tear-away stabilisers give the fabric a solid base. Also, use lighter-density designs on machines so the embroidery doesn’t become too stiff.
7. Creative Ideas for Denim Embroidery
Once you understand how to embroider on denim, you can try different projects to make your clothing and accessories more personal. Denim is versatile and strong, which makes it a good base for many embroidery styles.
Jeans pockets with floral patterns
Embroidering flowers on jeans pockets is a simple way to refresh old denim. Small motifs like daisies or vines look stylish on front or back pockets. You can use chain stitches or satin stitches for petals and add French knots for flower centers.
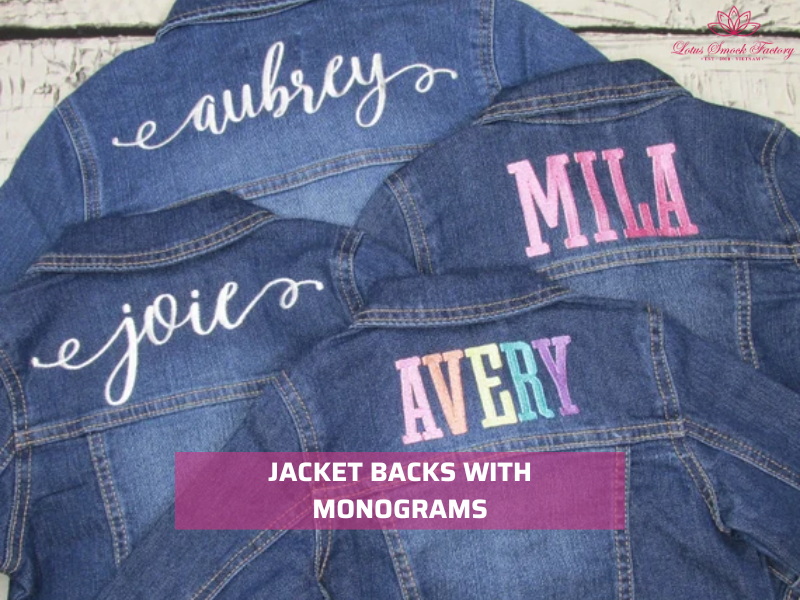
Jacket backs with monograms or leaves
Denim jackets give you plenty of space for bold embroidery. Large monograms across the back or leaf designs along the shoulders can create a statement piece. Hand embroidery gives a soft, textured look, while machine embroidery works well for clean and bold lettering.
=>>> Read more: How to Embroider Letters: A Step-by-Step Beginner’s Guide
Jacket backs with monograms or leaves
Tote bags with patches
Denim tote bags are practical and easy to decorate. You can stitch directly onto the bag or add embroidered patches for extra detail. If you want to learn patch-making, see our guide on how to make an iron on embroidery patch. Patches are also useful for covering worn areas.
=>>> Read more: How to Make Your Own Embroidery Patches
Visible mending with embroidery
Old denim often has small tears or worn spots. Instead of hiding them, you can repair them with embroidery. Stitches like sashiko, cross-stitch, or layered patterns turn mending into decoration. This method extends the life of denim while adding a creative touch.
8. FAQs About Denim Embroidery
8.1. Can you embroider directly on jeans?
Yes, you can embroider directly on jeans. Denim is sturdy enough to handle stitches, but it helps to use a hoop to keep the fabric flat. For thick seams or hard-to-reach areas, work hoopless and add a stabiliser to support the stitches.
8.2 Do you need stabiliser for denim?
Stabiliser is not always required for hand embroidery on denim, but it makes designs neater and prevents puckering. For machine embroidery, stabiliser is strongly recommended. Use cut-away stabiliser for long-lasting strength or tear-away stabiliser for lighter designs.
8.3 What stitches work best on denim?
Simple stitches that sit flat and hold firmly are best. Backstitch is good for outlines, satin stitch for bold fills, and chain stitch for texture. Detached chain (lazy daisy) works well for petals and leaves. These stitches balance strength with style on thick fabric.
8.4 Is machine embroidery safe for stretch denim?
Yes, you can use machine embroidery on stretch denim, but you must stabilise it. A cut-away stabiliser or fusible backing keeps the fabric from stretching under the stitches. Use lower-density designs and reduce speed to avoid puckering or needle breaks.
9. Final Words
Now you understand the basics of how to embroider on denim and why it is a practical way to personalise clothing and accessories. With sharp needles, stabilisers, and simple stitches, you can turn old jeans or jackets into something fresh. Start with small motifs like flowers or initials, then try larger projects such as jacket backs or tote bags once you feel confident.
Remember to prepare the fabric, secure your stitches, and use care when washing. Pick up a denim piece, choose your design, and begin your embroidery today.
Lotus Smock is a brand of TAQ SERVICE TRADING DEVELOPMENT JSC. In clothing business, we’ve been crafting unique pieces for the domestic market since 2010. We prioritize the quality, so we don’t accept overly big orders. We are committed to producing high-quality products at the best prices. Recently, we have started engaging in social media and marketing to reach international customers, bringing the best products from Vietnam to friends around the world.
Contact Lotus Smock at:
- Facebook: facebook.com/lotussmockfactory
- WhatsApp: +84 83 333 3498
- Youtube: youtube.com/@LotusSmockFactory