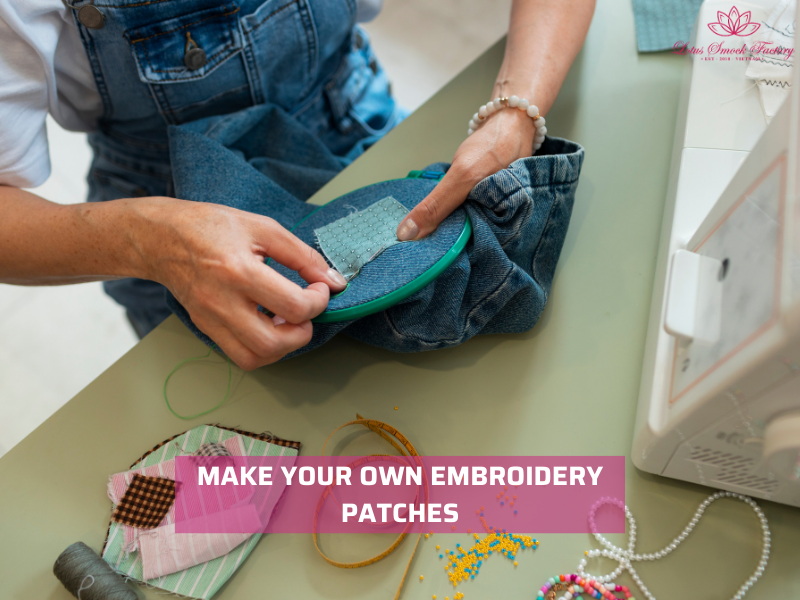
How to Make Your Own Embroidery Patches: A Complete Step-by-Step Guide
How to make your own embroidery patches? The answer is simple. An embroidery patch is a small piece of fabric decorated with thread, designed to be sewn or ironed onto clothes, bags, or other items. You can create one by hand or with a machine, and both methods give you full control over design, color, and size.
In this guide, you will learn step by step how to choose fabric, transfer a design, stitch neatly, and finish the patch so it lasts. Keep reading, and you will be ready to create patches that are both durable and stylish.
1. Why Make Your Own Embroidery Patches?
Making your own embroidery patches gives you more than just decoration. It is a simple craft that combines creativity, practicality, and even business potential. When you create patches yourself, you choose the fabric, design, and size that fit your exact needs. Here’s why:
- Personalization for clothing, bags, and home décor: You can stitch patches that match your style. Add them to jackets, jeans, tote bags, or even cushion covers to give plain items a personal touch.
- Express creativity: Patches let you turn an idea into something you can wear or display. Whether you how to embroider letters, flowers, or abstract patterns, the design will show your own taste.
- Unique branding opportunities: Handmade patches are popular in craft markets and online shops. They are small, easy to make in batches, and can be sold as custom designs.
- Cost savings: A patch is a practical way to repair worn clothes to save money. Instead of throwing away a torn jacket or faded jeans, you can cover the spot and make the garment look fresh again.
Making your own embroidery patches gives you many benefits
2. Materials & Tools You’ll Need
Before you start learning how to make your own embroidery patches, you need the right tools. The items you choose depend on whether you want to hand stitch or use a machine. Having the proper setup makes the process smoother and gives your patch a clean finish.
The table below shows what you need for both hand embroidery and machine embroidery.
| Category | Tools & Materials | Purpose / Notes |
| Hand Embroidery | Embroidery hoop | Keeps fabric tight and prevents puckering |
| Fabric: cotton, denim, felt | Cotton is easy for beginners, denim is sturdy, felt holds shape and doesn’t fray | |
| Embroidery floss or thread | Floss allows color variety and thickness control; thread works for small patches | |
| Embroidery needles (sizes 7–9) | Sharp tips with large eyes fit floss easily | |
| Scissors & fabric marker | Scissors trim neatly; marker helps trace designs | |
| Fusible interfacing (optional) | Adds stability to thin fabrics like cotton | |
| Machine Embroidery | Embroidery machine | Handles designs quickly and professionally |
| Digitizing software | Converts artwork into stitch files | |
| Stabilizer: tear-away or cut-away | Tear-away for light projects, cut-away for strong and washable patches | |
| Patch backing: iron-on adhesive, sew-on fabric, Velcro | Choose depending on whether you want permanent, temporary, or flexible attachment |
Expert Tip: When making patches for heavy use, such as on jackets or bags, we recommend using a medium-weight cut-away stabilizer. It keeps the patch shape crisp and prevents distortion after repeated washing.
3. Hand Embroidery Patch: Step-by-Step Guide
If you choose an embroidery patch by hand, you should follow the 5 easy steps below:
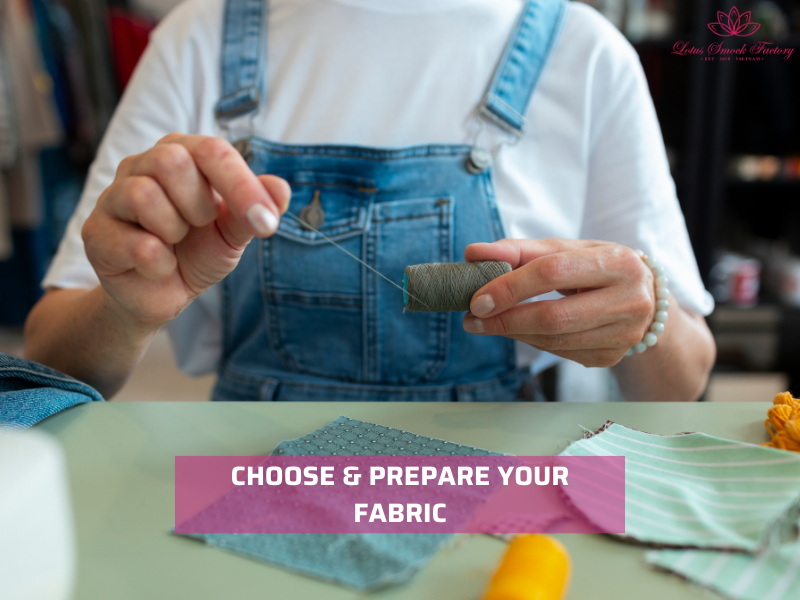
3.1. Step 1: Choose & Prepare Your Fabric
Start with a strong fabric that can hold stitches well. Cotton, denim, and felt are all good options. Denim gives a sturdy base if you want to create patches for jackets or bags, while cotton is easy for beginners.
- Cut the fabric slightly larger than your final patch size. This gives you room to trim neatly later.
- Add fusible interfacing if the fabric feels too thin. It adds stability and prevents warping.
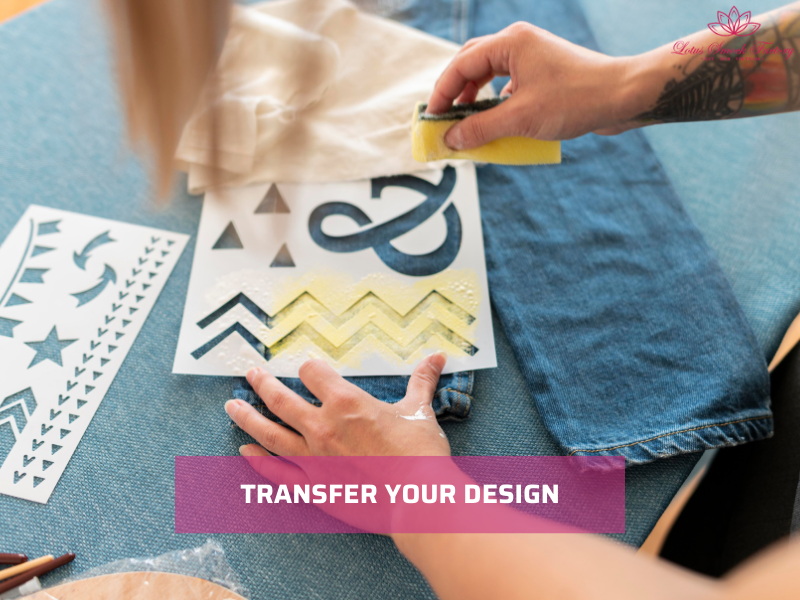
3.2. Step 2: Transfer Your Design
Once you pick a design, you need to get it onto your fabric. There are a few ways to do this:
- Trace with a water-soluble fabric marker.
- Use a heat transfer pen and press the design with an iron.
- Print on stabilizer sheets and stitch directly over the guide.
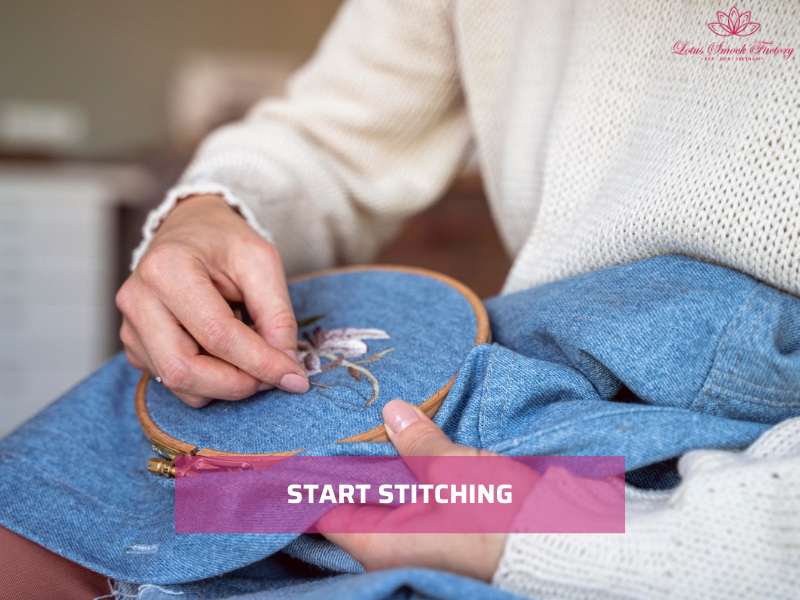
3.3. Step 3: Start Stitching
Now it’s time to bring your patch to life. Use embroidery stitches that both outline and fill your design.
- Satin stitch: best for smooth, filled areas.
- Backstitch: strong for outlines or lettering.
- Chain stitch: adds decorative texture.
- Fill stitches: cover large spaces with even color.
Expert Tip: You should always stitch from the center outward. This keeps the design symmetrical and prevents puckering around the edges.
3.4. Step 4: Cut and Finish Edges
Once your design is complete, trim the patch close to the stitches.
- Cut carefully with sharp embroidery scissors.
- Seal the edges with one of these methods: blanket stitch by hand, zigzag stitch on a machine, or liquid fray check.
- If you like a bold border, blanket stitch is both decorative and functional.
3.5. Step 5: Add the Backing
The backing makes your patch ready to use.
- Use iron-on adhesive for quick application on fabric items.
- Add a felt or fabric layer for sew-on patches. This method is better if you want to reuse the patch or place it on thick materials like bags.
4. Machine Embroidery Patch: Step-by-Step Guide
Creating embroidery patches with a machine is faster and gives you very neat edges. The process is different from hand embroidery because you need software, stabilizers, and proper finishing. Follow the steps below to get professional-quality patches.
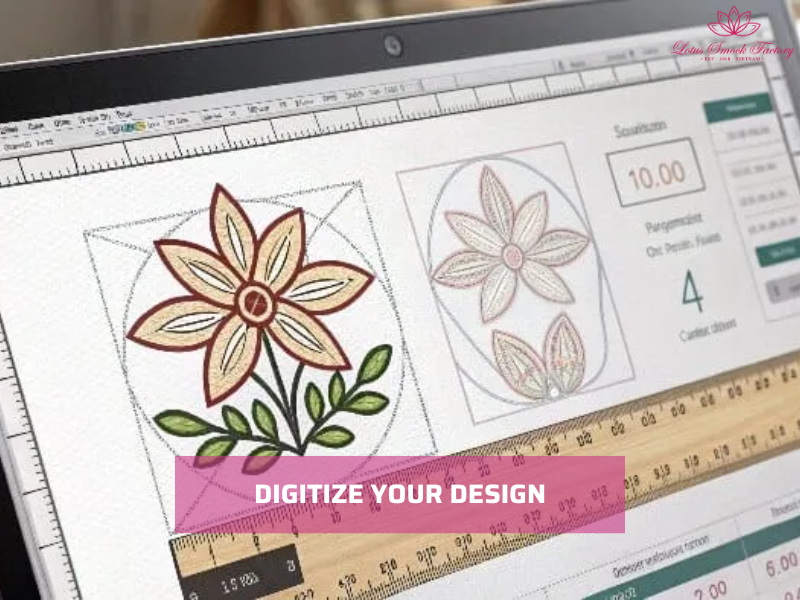
4.1. Step 1: Digitize Your Design
Before stitching, you must prepare your design file.
- Use embroidery software to convert your artwork into a machine-readable file.
- Include a border in the design, such as a satin stitch or merrow-style edge, so the patch looks polished.
- Adjust size and stitch density depending on whether the patch will go on light clothing or heavy fabric like jackets.
4.2. Step 2: Hoop the Stabilizer & Fabric
Good hooping is key to getting clean stitches.
- Place a piece of tear-away or cut-away stabilizer in your hoop.
- Lay the fabric on top and smooth it out to avoid wrinkles.
- Make sure the fabric is pulled tight so it won’t shift during stitching.
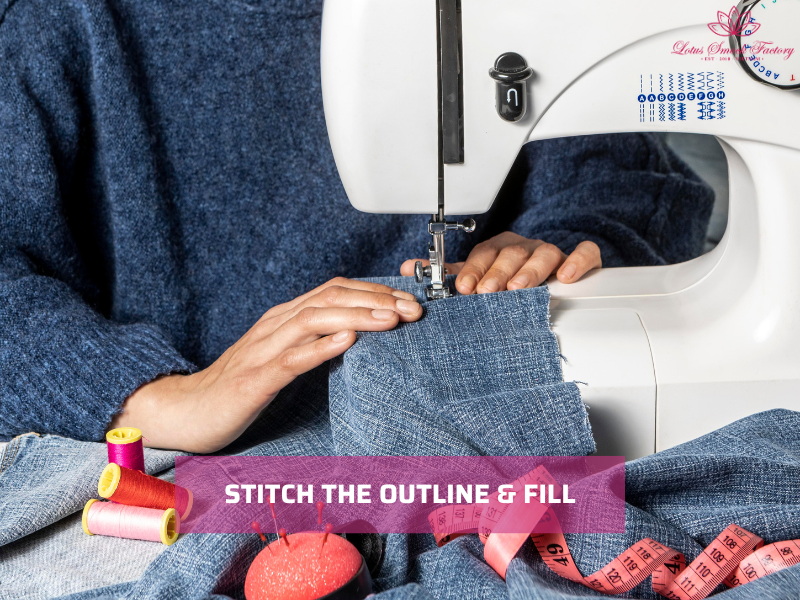
4.3. Step 3: Stitch the Outline & Fill
Once the fabric is secure, you can start the embroidery process.
- Run a placement stitch to mark the patch shape.
- Stitch the satin border around the edge to seal the fabric.
- Continue with fill stitches to complete your design. This creates solid colors and smooth textures.
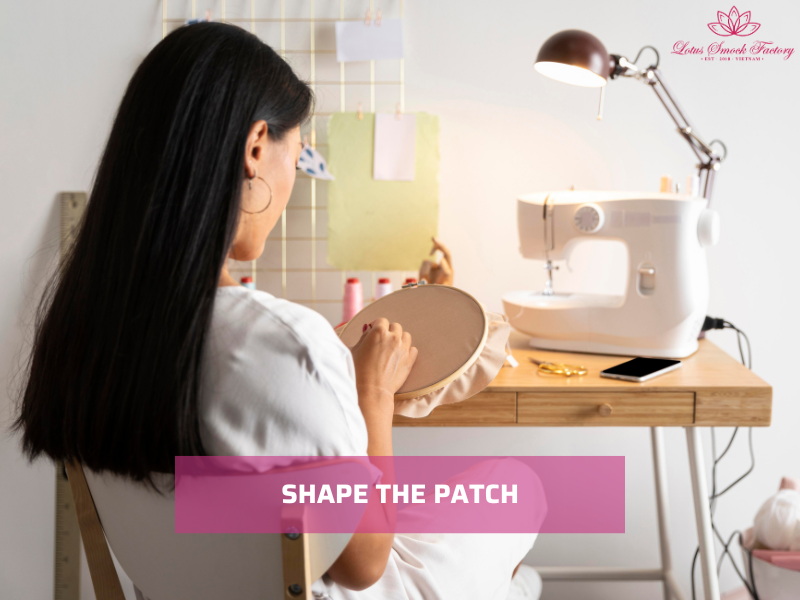
4.4. Step 4: Remove & Trim
When the embroidery is finished, it’s time to shape the patch.
- Take the fabric out of the hoop carefully.
- Trim away the excess fabric and stabilizer close to the border without cutting into the stitches.
- For durability, you can add a second satin border after trimming.
4.5. Step 5: Apply Backing
The last step makes your patch ready to use.
- Use heat-seal or iron-on adhesive if you want a quick application.
- Choose Velcro or sew-on backing if you plan to move the patch between items.
- Heat-seal backings are often used for selling patches because they give buyers the flexibility to iron or stitch them on.
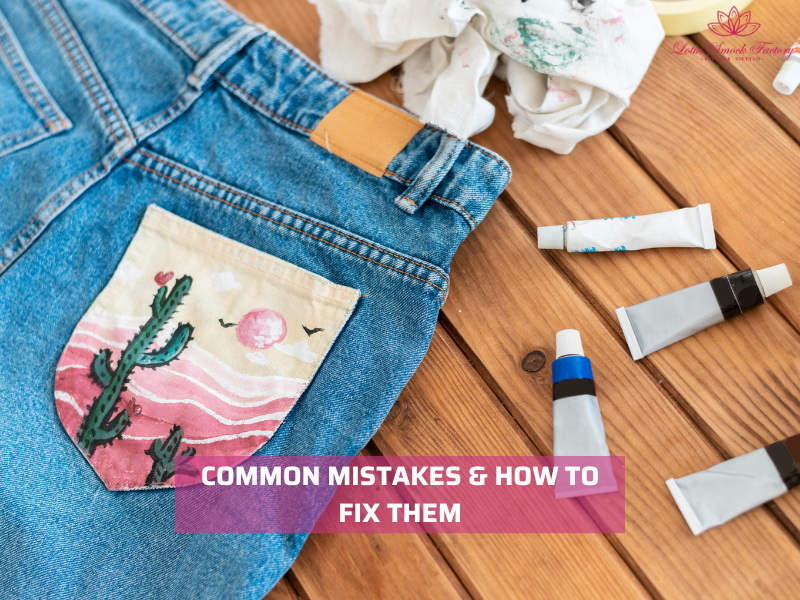
5. Common Mistakes & How to Fix Them
When making embroidery patches, it’s easy to run into small problems that affect the final look. Here are the most common mistakes and simple ways to fix them.
5.1. Puckering fabric is a common issue when the fabric pulls and looks wrinkled after stitching.
To correct the mistake, you can:
- Use the right stabilizer for the fabric weight (cut-away for heavy fabrics, tear-away for light fabrics).
- Keep the fabric tight in the hoop so it doesn’t shift.
- Avoid pulling the thread too tightly while stitching.
5.2. Uneven edges happen when the patch looks rough or not cut cleanly.
To correct the mistake, you can:
- Use sharp embroidery scissors designed for precision cutting.
- Trim slowly around the patch without cutting into the border stitches.
- Add a satin stitch or blanket stitch around the edge for a neat finish.
5.3. Thread tangling occurs when the thread twists or knots during stitching.
To correct the mistake, you can:
- Keep thread length under 45 cm (18 inches) for hand embroidery.
- Separate strands of floss before stitching so they don’t twist.
- Run thread through a thread conditioner or wax if it frays easily.
5.4. A patch that feels too stiff makes the fabric uncomfortable to wear.
To correct the mistake, you can:
- Choose a lighter backing material for delicate fabrics.
- Skip heavy adhesive if you plan to sew the patch instead of ironing it.
- Use a medium-weight stabilizer instead of multiple layers.
6. Care & Maintenance for Long-Lasting Patches
If you want your embroidery patches to last, you need to handle them the right way. The way you wash, dry, and store them makes a big difference in their durability.
6.1. Wash instructions for iron-on vs sew-on patches
- For iron-on patches: Wash on a gentle cycle in cold water. Avoid hot water, as heat can weaken the adhesive. Turn garments inside out before washing.
- For sew-on patches: You can wash more normally, but still use cold or warm water to protect the thread. Avoid bleach, which can fade both thread and fabric.
6.2. Re-ironing tips if edges lift
- If you see edges lifting on an iron-on patch, you place a thin pressing cloth over it and press with a hot iron for 10–15 seconds.
- Always keep the steam setting off to prevent moisture from loosening the glue.
- If lifting continues, consider adding a few hand stitches around the edges for extra hold.
6.3. Storage to prevent bending or curling
- Store garments with patches folded loosely or hung on hangers to keep them flat.
- For unused patches, you keep them between sheets of wax paper or inside a small envelope. Store in a dry place away from direct sunlight.
- Avoid stacking heavy items on top of patches, as pressure can curl or damage them.
Tip: If you notice patches starting to curl or loosen after several washes, combine re-ironing with a few stitches around the edges. This small step makes your patch last much longer, especially on frequently worn garments.
7. FAQs
7.1. Can you make patches without a hoop?
Yes, you can make patches without a hoop, but using one helps keep the fabric tight and flat. Without a hoop, the fabric may shift, and your stitches can look uneven.
If you prefer not to use a hoop, choose a sturdy fabric like felt or denim and work with smaller patch sizes to keep better control. For designs like embroidery letters, a hoop often makes spacing cleaner.
7.2. What’s the best fabric for patches?
The best fabrics for patches are sturdy and easy to stitch. Cotton, denim, twill, and felt are common choices. These fabrics hold stitches well and don’t fray easily.
Avoid stretchy or sheer fabrics because they distort during stitching. If you want to make a patch for jackets or jeans, embroider on denim for a strong, long-lasting result.
7.3. How do you make waterproof patches?
To make waterproof patches, use a water-resistant fabric as the base or add a waterproof backing after stitching. You can apply a clear fabric sealant spray or use an adhesive waterproof patch film. This is especially useful for outdoor gear or bags. If you want extra durability, pair waterproof backing with iron-on adhesive.
7.4. Can you embroider directly onto a jacket instead?
Yes, you can embroider directly onto a jacket. This works best on denim or cotton jackets. If the fabric is thick, use stronger needles and stabilizers to prevent puckering.
For lighter jackets, making a separate patch and then sewing it on is often easier. Many crafters like to embroider on clothes this way, since it allows more flexibility in placement and repair.
8. Final Words
Now you know how to make your own embroidery patches from start to finish. With the right tools, fabric, and stitches, you can turn a plain garment into something unique and personal. Remember to finish edges neatly and select the appropriate backing to ensure your patch remains strong through wear and washing. Start small with one design and practice until you feel confident.
Lotus Smock is a brand of TAQ SERVICE TRADING DEVELOPMENT JSC. In clothing business, we’ve been crafting unique pieces for the domestic market since 2010. We prioritize the quality, so we don’t accept overly big orders. We are committed to producing high-quality products at the best prices. Recently, we have started engaging in social media and marketing to reach international customers, bringing the best products from Vietnam to friends around the world.
Contact Lotus Smock at:
- Facebook: facebook.com/lotussmockfactory
- WhatsApp: +84 83 333 3498
- Youtube: youtube.com/@LotusSmockFactory