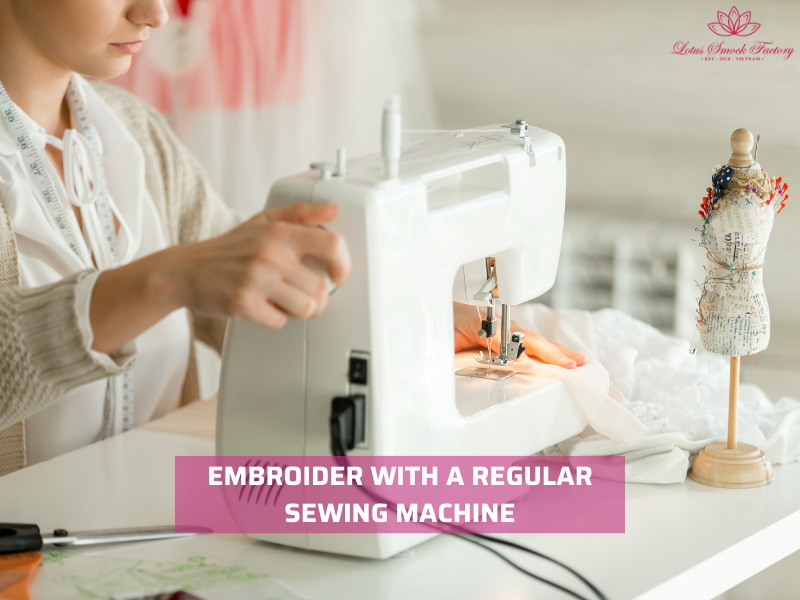
How Can I Embroider with a Sewing Machine? Beginner’s Guide
Yes, you can embroider with a sewing machine. The process is called free-motion embroidery, and it allows you to create decorative stitches on fabric using your regular machine. Instead of relying on the feed dogs to move the fabric, you guide it yourself to “draw” your design with the needle. Many beginners ask, “how can I embroider with a sewing machine?“ because they worry about puckering fabric, broken needles, or messy stitches. The good news is that with the right setup, stabiliser, and practice, you can achieve clean, creative results.
This guide explains step by step how to prepare your fabric, adjust your machine, stitch smoothly, and explore projects that bring your ideas to life.
1. Can You Really Embroider with a Regular Sewing Machine?
Yes, you can embroider with a regular sewing machine. The process is called free-motion embroidery, and it lets you move the fabric by hand while the needle stitches. This technique works well for beginners, budget-conscious users, DIY projects, and people who do not want to buy a dedicated embroidery machine. Therefore, with the right setup, you can create outlines, letters, and even decorative patterns.
A regular sewing machine and an embroidery machine are different tools. Here’s the difference:
- An embroidery machine follows digital designs automatically. It moves the needle and fabric in a programmed way to create logos, lettering, or complex motifs.
- A sewing machine does not follow designs automatically. You will need to control the fabric with your hands, guiding it under the needle to draw shapes.
What a sewing machine can do for embroidery:
- Free-motion embroidery: Lower the feed dogs, attach a darning or embroidery foot, and guide fabric freely.
- Zigzag stitch embroidery: Use the zigzag setting to fill shapes or create bold edges.
- Decorative stitches: Many machines have built-in stitch patterns that add simple designs.
2. Tools & Materials You’ll Need for Sewing Machine Embroidery
Before you begin, ensure you have the necessary tools and supplies. The right setup makes your stitches cleaner and prevents problems like puckering or thread breaks.
2.1. Sewing Machine Setup
To embroider with a regular sewing machine, you need to adjust the machine and add a few parts:
- Darning/embroidery foot: This foot allows you to move the fabric freely under the needle. It gives you space to “draw” with stitches.
- Drop feed dogs: Lower the feed dogs so the fabric does not move automatically. If your machine cannot drop the feed dogs, cover them with a plate.
- Machine settings: Use straight stitch for outlines. Switch to zigzag when you want a filled or bolder look. Adjust tension until stitches lie flat without pulling the fabric.
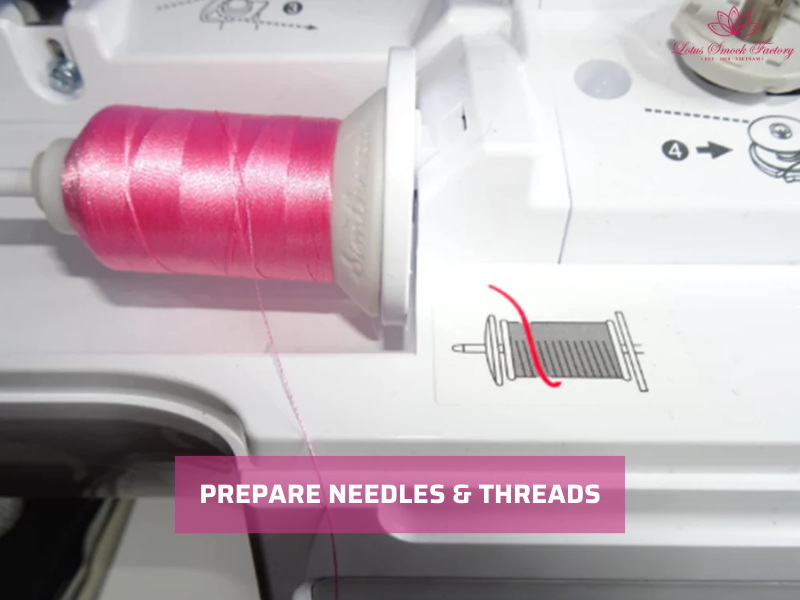
2.2. Needles & Threads
Using the right needle and thread helps prevent skipped stitches and breakage.
- Embroidery needles (size 75/11–90/14): These have larger eyes to reduce friction and prevent shredding. Use smaller sizes for light fabrics and larger ones for denim or sweatshirts.
- Polyester or rayon thread: Both add sheen and work well for decorative designs. Rayon gives a soft finish, while polyester is stronger and resists breaking.
- Cotton thread: Creates a matte look, often used for monograms or simple outlines.
2.3. Stabiliser Options
Stabilisers support the fabric and stop it from shifting while you stitch. They also prevent puckering around designs.
- Tear-away stabiliser: Easy to remove after stitching. Works best with stable fabrics like cotton.
- Cut-away stabiliser: Stays in place permanently. Use it with stretchy fabrics or dense designs.
- Fusible stabiliser: Iron it onto the back of knit fabrics to keep them firm. It adds extra control for beginners.
Without a stabiliser, your fabric may wrinkle, stretch, or distort. Always test with a small piece before starting on the final design.
2.4. Extra Essentials
Moreover, you should add a few more items to make sewing machine embroidery easier and cleaner.
- Embroidery hoop (optional): Keeps fabric taut, especially helpful for lightweight materials. Not always required for thick fabrics.
- Fabric markers or chalk: Let you mark the design lines. Choose water-soluble options so the marks can be easily washed out.
- Small scissors: Trim thread ends neatly. Sharp tips help you cut close without damaging the fabric.
3. Step-by-Step: How to Embroider with a Sewing Machine
Machine embroidery looks complex, but it becomes simple when you break it into small actions. Follow these five steps to prepare, stitch, and finish your work neatly.
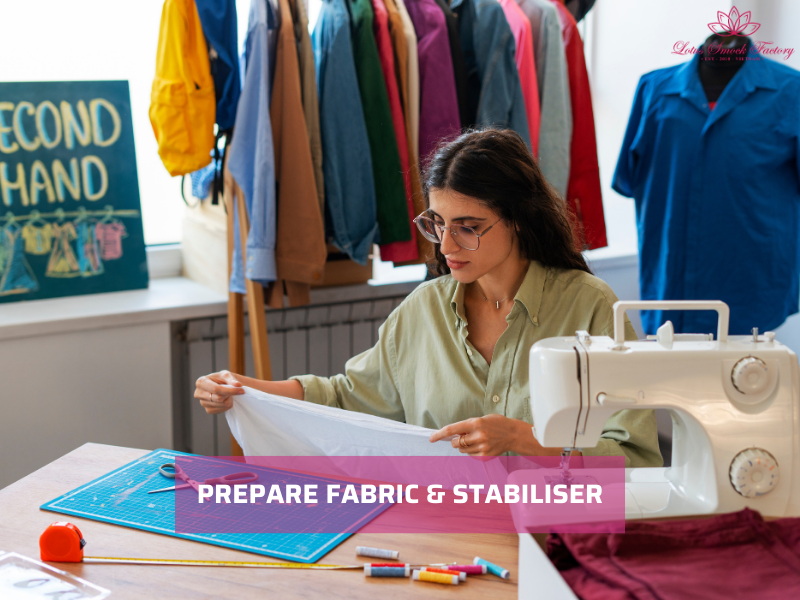
3.1. Step 1: Prepare Fabric & Stabiliser
Preparation is the first step to clean embroidery. You follow:
- Wash the fabric. This removes dust and chemicals that may cause uneven stitches or shrinkage later.
- Iron the fabric. A flat surface helps your design stay smooth. Wrinkles create uneven tension and distort stitches.
- Add stabiliser. Place a stabiliser at the back of your fabric. Choose tear-away for cotton, cut-away for stretch fabrics, or fusible for knits. The stabiliser holds the fabric steady and prevents puckering.
Taking time to prepare now avoids problems during stitching. Beginners who skip stabiliser often see wrinkled designs after only a few stitches.
3.2. Step 2: Set Up the Sewing Machine
Your machine needs small changes to act like an embroidery tool.
- Attach a darning or embroidery foot. This foot gives space to move the fabric in any direction.
- Drop the feed dogs. These are the small teeth under the needle plate. Lower them so they do not push the fabric automatically. If your machine cannot drop them, cover them with a plate.
- Adjust stitch length and tension. For free-motion embroidery, stitch length does not matter because you control movement. Keep tension balanced: too tight causes thread breaks, too loose leaves messy loops.
A quick test on scrap fabric helps you set tension correctly before starting your design.
3.3. Step 3: Mark & Secure Design
Your stitches follow the design you draw.
- Trace the design with a water-soluble pen, chalk, or carbon paper. These marks wash out after sewing.
- Hoop the fabric if needed. Place both the fabric and stabiliser into an embroidery hoop. Tighten until smooth but not overstretched. A hoop keeps tension even and makes stitches neater.
If the fabric is thick like denim or a sweatshirt, you may stitch without a hoop. In this case, move slowly and keep the fabric flat with your hands.
=>>> Read more: How to Embroider on Denim: A Complete Guide for Beginners
3.4. Step 4: Start Stitching
Now you can begin embroidery with your machine.
- Free-motion embroidery. Move the fabric manually under the needle to “draw” your design. Guide the fabric with your hands while the machine sews.
- Choose stitches. Use a straight stitch for outlines and details. Switch to zigzag for thicker lines or filled areas.
- Control speed and movement. Keep the machine at a steady speed. Move your hands smoothly. If you move too fast, stitches become long and uneven. If you move too slowly, the design looks crowded.
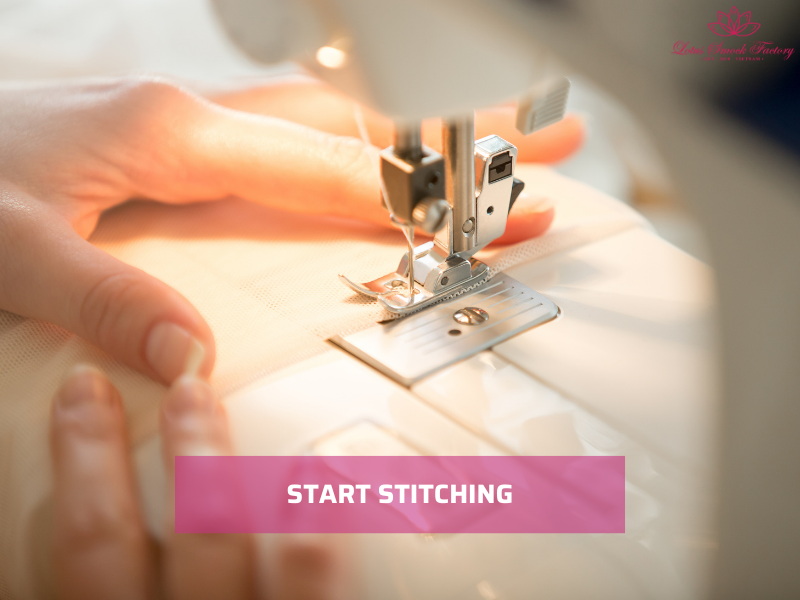
Tip: We recommend always looking at where the needle enters the fabric, not at your hands. This helps you stay accurate.
3.5. Step 5: Finish & Clean Up
The last step makes your work durable and neat.
- Secure the ends. Knot or backstitch at the end of each section. This prevents unraveling.
- Trim stabiliser. Tear away or cut the stabiliser close to the stitches. Leave a small margin for strength.
- Press the fabric. Place it face down on a towel. Use medium heat with a pressing cloth between the iron and fabric. This protects stitches from flattening.
When you finish these steps, your fabric will carry a clean, strong embroidery design.
4. Common Problems & How to Fix Them in Sewing Machine Embroidery
Even with a good setup, beginners often face problems when embroidering with a sewing machine. Most of these issues come from fabric tension, thread choice, or needle size. Here are the common problems and how to solve them.
Fabric puckering
Puckering happens when fabric gathers or wrinkles around the stitched area. This makes your design look distorted and flat instead of smooth. It usually occurs when the fabric is too loose, not supported by a stabiliser, or stretched too tightly in the hoop.
⇒ You should add a stabiliser and adjust hoop tension until the fabric feels firm but not overstretched.
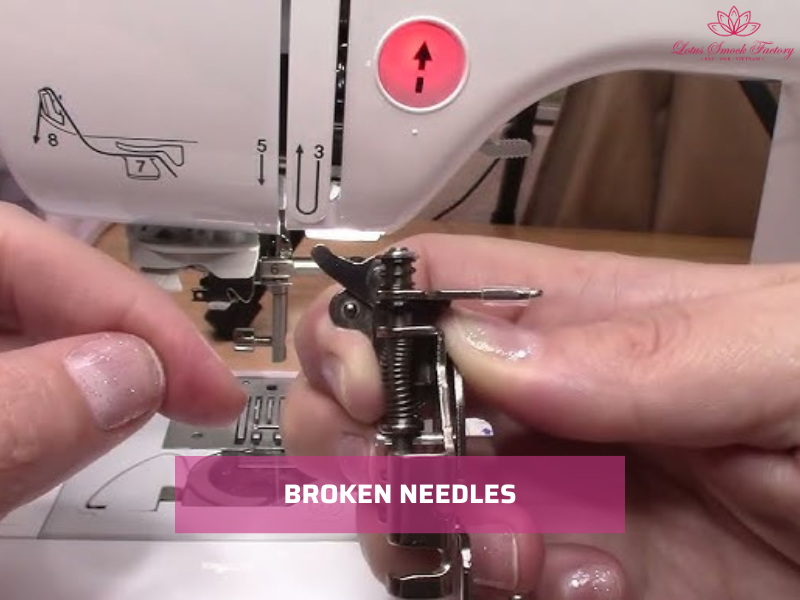
Broken needles
Needles may snap in the middle of stitching. This interrupts your work, risks leaving marks on the fabric, and sometimes bends the machine’s needle plate. Causes include forcing the needle through thick material, using a small needle on heavy fabric, or hitting a hoop edge.
⇒ To fix it, you use the correct needle size for your fabric. Use size 75/11 for cotton and 90/14 for denim or sweatshirts.
Uneven stitches
Uneven stitches show as inconsistent lengths. Some are too short, others are too long. It usually happens when fabric movement is not steady, the hoop is loose, or the thread tension is not balanced.
⇒ Fix it by keeping a steady machine speed and adjusting tension until stitches lie flat without loops or pulling.
Thread breaks
Threads can snap suddenly, leaving gaps and messy ends. This often comes from poor-quality thread, long thread lengths that twist, or friction in the needle eye. Thread breaks slow down your progress and weaken the design.
⇒ You fix it by switching to high-quality embroidery thread and cutting shorter lengths, around 30–40 cm, to keep it smooth.
Expert Tip: You should always test on scrap fabric before starting the final design. This helps you adjust tension, thread, and stabiliser without wasting your main fabric.
5. Creative Ways to Use Sewing Machine Embroidery
Sewing machine embroidery is not only about practicing stitches. You can use it to add personal style and value to everyday items. Below are practical ways to apply your designs.
Monograms on towels, shirts, and napkins
Adding initials is one of the most common embroidery projects. A straight stitch works well for small letters, while a satin stitch gives a bold finish. Monograms on towels, shirts, or napkins make thoughtful gifts and also add character to boutique clothing.
If you want to practice, start with simple letters before moving on to full names. You can also read our guide on embroidery letters for more details.
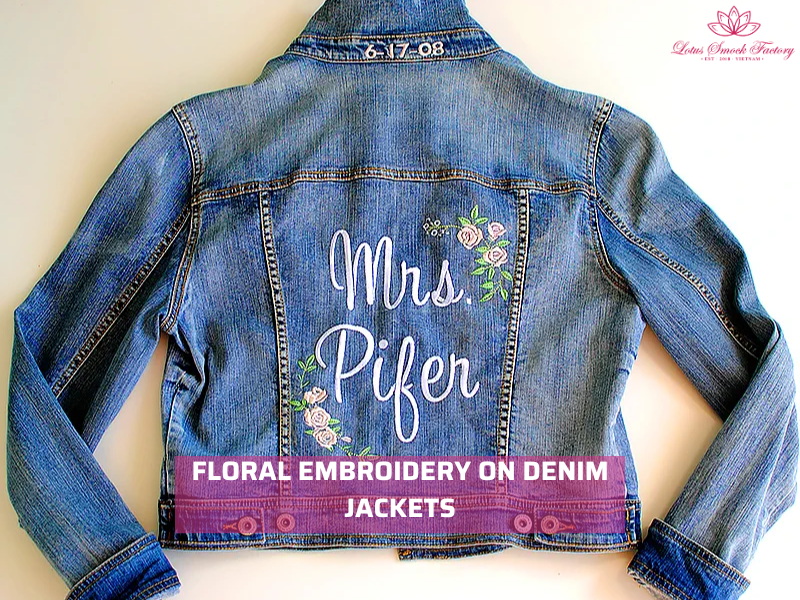
Floral embroidery on denim jackets
Flowers stitched on denim stand out and last long because denim is strong. You can add small daisies on pockets, roses across the back, or vines on sleeves.
For beginners, simple patterns are easier to control with free-motion embroidery. If you want to learn step by step, check our tutorial on how to embroider flowers.
Decorative accents on sweatshirts and tote bags
Sweatshirts and tote bags give a flat, wide surface, which is ideal for embroidery. Small motifs on cuffs, chest pockets, or bag corners turn plain fabric into something eye-catching.
Remember to use a cut-away stabiliser on stretchy sweatshirts to avoid puckering. For more guidance, see how to embroider a sweatshirt.
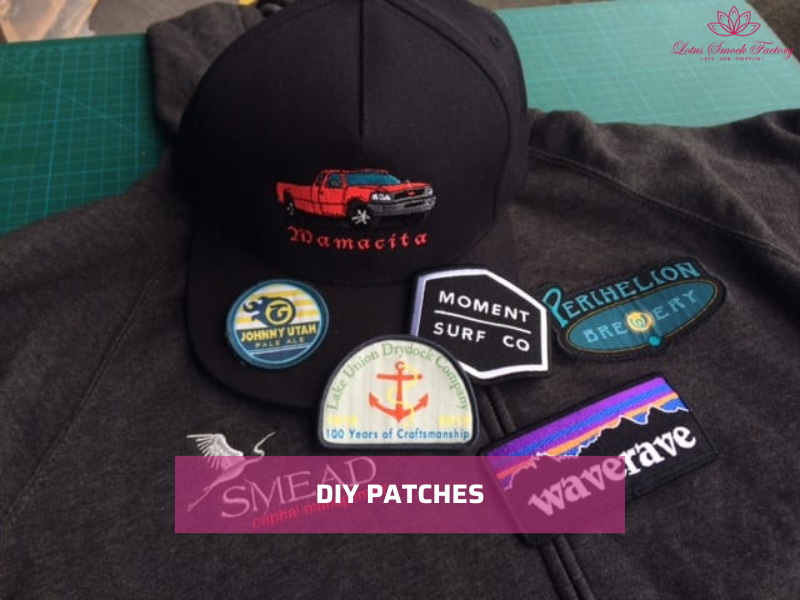
DIY patches
Sewing machine embroidery also lets you create custom patches. You can stitch designs on a spare piece of fabric, cut them out, and apply them with heat-bond backing. Patches work for jackets, backpacks, or hats.
They are a flexible option if you want to test new designs before stitching directly onto clothing. For more techniques, read our guide on how to make your own embroidery patches.
6. Hand Embroidery vs Sewing Machine Embroidery
Both hand embroidery and sewing machine embroidery let you decorate fabric, but they give different results. The table below shows the key differences.
| Feature | Hand Embroidery | Sewing Machine Embroidery |
| Speed | Slow, each stitch made by hand. | Fast, covers large areas quickly. |
| Control | High control, good for delicate curves and tiny details. | Less control, fabric movement depends on technique. |
| Look | Textured, personal, slightly varied stitches. | Smooth, uniform, often less textured. |
| Cost | Low setup, only thread, needle, and hoop. | Requires a sewing machine and extra tools (foot, stabiliser). |
When to Choose Hand Embroidery
- Best for small motifs like flowers, initials, or French knots.
- Good when you want personal detail or textured stitches.
- Works well on lightweight fabrics and small items.
When to Choose Sewing Machine Embroidery
- Best for large designs like denim jackets, tote bags, or sweatshirts.
- Good when you need speed and consistency.
- Works well for monograms, patches, or repeated patterns.
7. FAQs
7.1. Can you embroider with any sewing machine?
Yes. Most regular sewing machines can do embroidery if you use the free-motion method. You lower the feed dogs and guide the fabric by hand. While not as advanced as an embroidery machine, it still works for small designs, monograms, and simple patterns.
7.2. Do you need a special foot for embroidery?
Yes. A darning or embroidery foot is required. This foot lets the needle move freely without pressing the fabric down too tightly. It gives you space to move the fabric in different directions while stitching.
7.3. What stitches can you use?
Straight stitch and zigzag stitch are the most common. A straight stitch works for outlines and lettering. A zigzag stitch is useful for thicker lines or filled areas. Some machines also have decorative stitches that can be adapted for embroidery.
7.4. Is stabiliser always required?
Almost always. Stabiliser prevents fabric from stretching, puckering, or distorting under stitches. Tear-away stabiliser is good for cotton. Cut-away stabiliser works better for stretch fabrics. Without stabiliser, most designs will look uneven or collapse after washing.
7.5. Can beginners learn free-motion embroidery?
Yes. Beginners can learn free-motion embroidery with practice. Start with small designs on scrap fabric. Focus on keeping a steady speed and moving your hands smoothly. With time, you’ll gain control and be able to stitch more complex designs.
8. Final Words
Learning “how can I embroider with a sewing machine?” opens a new way to personalise fabric without special equipment. By using the right needle, thread, and stabiliser, you can turn simple fabric into monograms, floral designs, or even DIY patches. The key is practice and steady control of your fabric under the needle.
Start small with a scrap piece, then move on to clothes, accessories, or gifts. With each project, your confidence will grow. Gather your sewing machine, thread, and stabiliser today and begin your first embroidery design.
Lotus Smock is a brand of TAQ SERVICE TRADING DEVELOPMENT JSC. In clothing business, we’ve been crafting unique pieces for the domestic market since 2010. We prioritize the quality, so we don’t accept overly big orders. We are committed to producing high-quality products at the best prices. Recently, we have started engaging in social media and marketing to reach international customers, bringing the best products from Vietnam to friends around the world.
Contact Lotus Smock at:
- Facebook: facebook.com/lotussmockfactory
- WhatsApp: +84 83 333 3498
- Youtube: youtube.com/@LotusSmockFactory