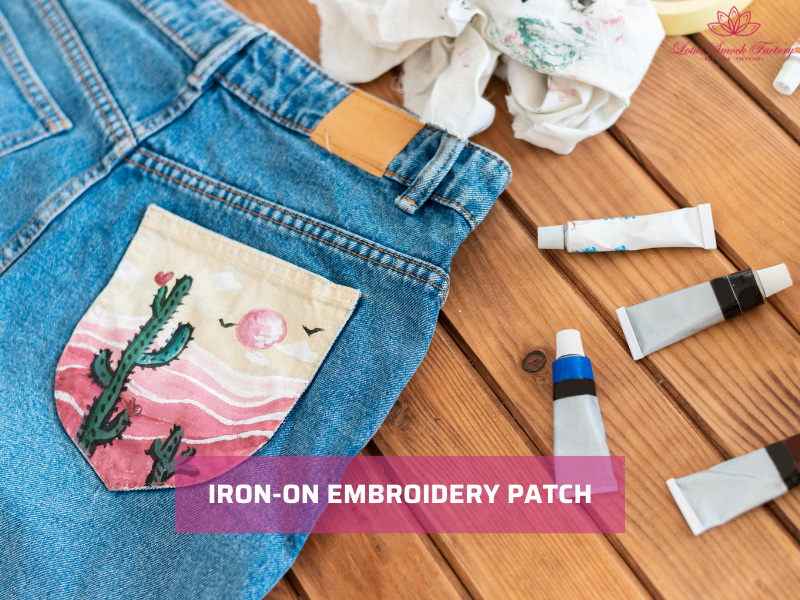
How to Make an Iron-On Embroidery Patch (Step-by-Step DIY Guide)
An iron-on embroidery patch is a stitched design with heat-activated adhesive on the back. Learning how to make an iron on embroidery patch allows you to personalize clothes, repair worn areas, or create products for small businesses. Patches work well on jackets, jeans, tote bags, and kids’ outfits. You can easily design at home with basic supplies like fabric, thread, and fusible web.
In this guide, you will learn step by step how to design, stitch, back, and apply your own patch. You will also get pro tips to avoid mistakes and make your patches last longer.
1. What Is an Iron-On Embroidery Patch?
An iron-on embroidery patch is a decorative piece of fabric with a stitched design and a special backing that bonds to clothing when heated. The backing is coated with a heat-activated adhesive. When you press it with a household iron, the adhesive melts and sticks firmly to the garment. This allows you to apply patches without sewing.
The main difference between iron-on patches and sew-on patches is how they attach:
- Iron-on patches use adhesive, making them quick and beginner-friendly.
- Sew-on patches require stitching and take longer, but may last longer on heavy fabrics.
People use iron-on embroidery patches in many ways:
- Fashion: add flowers, patterns, or slogans to jackets and jeans.
- Branding: apply company logos to uniforms or hats.
- DIY gifts: personalize tote bags, napkins, or baby clothes with names or designs.
- Boutique sales: create seasonal patches such as Christmas, Halloween, or Easter for customers.
Pro Tip: Even with an adhesive backing, stitching around the edges can increase patch durability by about 50%. This helps it stay in place through more washes and wear.
2. Tools & Materials You’ll Need
Before you start making patches, gather the right supplies. Using suitable fabric, thread, and adhesive will make your patch stronger and easier to apply.
2.1. Fabric for Patches
The base fabric decides how durable and neat your patch will be. You should choose:
- Best choices: cotton twill, denim, and felt. These fabrics are thick enough to hold stitches and give the patch structure.
- Fabrics to avoid: stretchy knits or sheer fabrics. They don’t hold embroidery well and may warp when you iron the patch.
2.2. Embroidery Supplies
You need basic embroidery tools to create the stitched design, including:
- Embroidery floss: cotton floss works well, and you can split strands for thicker or thinner lines.
- Stabilizers: add strength behind the fabric and stop it from stretching.
- Embroidery hoop: keeps fabric tight while you stitch, preventing puckering.
- Needles: use embroidery needles with a larger eye, which makes threading floss easier. Choose the size based on the thickness of your fabric.

2.3. Iron-On Adhesive Options
The adhesive is what allows your patch to stick to clothing. You should choose:
- Fusible web: products like HeatnBond or Wonder Under melt when heated, bonding fabric layers together.
- Sheets vs rolls: pre-cut sheets are convenient for small patches, while rolls work better if you plan to make several.
- Washable adhesive: always choose a type that holds up after repeated washes.
2.4. Cutting & Finishing Tools
Moreover, you should prepare cutting and finishing tools. Clean edges make your patch look professional and stop fraying.
- Scissors: Small, sharp scissors help you cut fabric neatly.
- Pinking shears or rotary cutter: create stronger edges and reduce fraying.
- Pressing cloth: place between the iron and your patch to protect stitches when applying heat.
Having these materials ready before you start will make the process smoother and give you a patch that lasts longer on clothing or accessories.
3. Step-by-Step Guide: How to Make an Iron-On Embroidery Patch
Creating your own patch is a simple process once you follow each step. Below is a guide that takes you from designing your patch to applying it to clothes or accessories.
3.1. Step 1: Design Your Patch
Start by deciding what your patch will look like. You can sketch your own design on paper or download pre-made embroidery patterns to trace. Think about where you will use the patch, because that affects the size.
- A patch that is too small may not be visible on jackets or bags.
- A patch that is too large may wrinkle or peel off easily.
A good size for most patches is between 5–8 cm across, which makes it visible but still practical to apply.
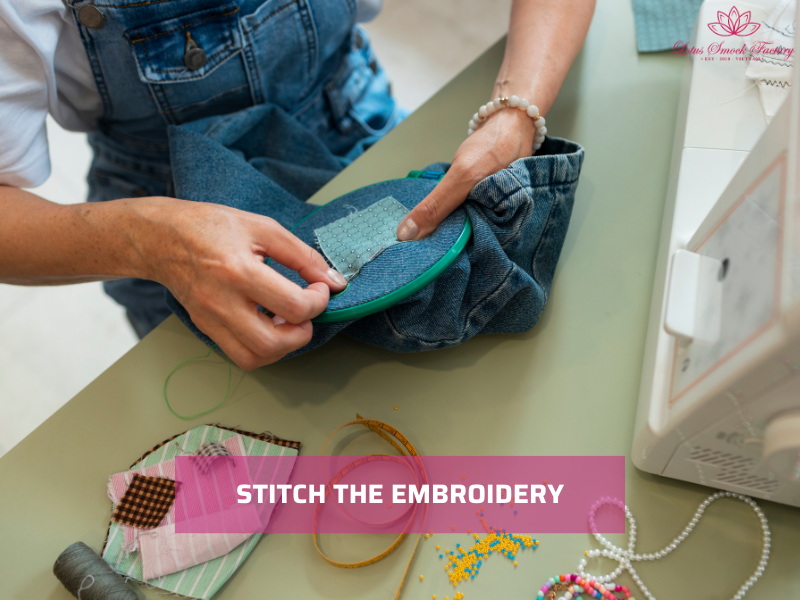
3.2. Step 2: Stitch the Embroidery
Once you have your design, stitch it onto your chosen fabric. Place the fabric in an embroidery hoop so it stays firm while you work.
Choose simple, bold stitches that look clear from a distance:
- Satin stitch: fills areas smoothly, perfect for petals or block letters.
- Backstitch: outlines shapes and lettering with clean lines.
- French knot: adds dots and textured details, useful for flower centers or accents.
Pro Tip: You should use bright or contrasting colors so the patch stands out. Thicker floss (four to six strands) gives a strong, visible effect.
3.3. Step 3: Apply Stabilizer & Backing
When the embroidery is finished, add a stabilizer to the back. This gives the patch strength and stops the stitches from pulling.
- Place a piece of stabilizer behind the embroidery.
- Cut out the patch carefully with scissors, following the outline of your design.
- Keep the edges smooth. Jagged edges make the patch harder to seal later.
3.4. Step 4: Attach Iron-On Adhesive
Now add the iron-on backing. Fusible web products such as HeatnBond or Wonder Under are the most common choice.
- Place the fusible web behind the patch with the adhesive side facing the fabric.
- Lay a pressing cloth on top to protect the stitches.
- Press with an iron set to medium heat (no steam) for 10–15 seconds.
The adhesive melts and bonds to the patch, creating the iron-on layer you will use later.
3.5. Step 5: Trim & Seal Edges
Clean edges make your patch look professional and help it last longer.
- Trim the patch with sharp scissors or pinking shears.
- Seal the edges with one of these methods:
- Satin stitch all around the border.
- Use a zig-zag stitch on a sewing machine.
- Apply a thin layer of fabric glue.
These methods prevent fraying and keep your patch intact even after washing.
3.6. Step 6: Apply Your Patch
Once your patch is finished, you can attach it to clothing, bags, or accessories.
- Place the patch where you want it.
- Cover it with a pressing cloth to protect the stitches.
- Press firmly with a medium-hot iron for 15–20 seconds.
- Allow it to cool before checking if the edges are secure.
If any edge lifts, press again for a few more seconds. For extra strength, you can sew a few stitches around the border.

4. Common Mistakes & How to Fix Them
Even a well-stitched patch can fail if the backing or edges are handled incorrectly. Here are common errors when making iron-on embroidery patches and how to solve them.
Using steam results in a weak adhesive
Steam stops the adhesive from melting evenly. This weakens the bond and makes the patch lift after a few washes.
=> Fix it by turning off the steam function on your iron. Always use a dry, medium heat setting for the best bond.
Forgetting the stabilizer leads to curling or wrinkles
Without stabilizer, the fabric may warp once heat is applied. This causes the patch to curl at the edges or wrinkle in the center.
=> You should add a layer of stabilizer behind the embroidery before cutting out the patch.
Cutting too close causes frayed edges
If you trim the fabric too close to the stitches, the edges may fray and weaken over time.
=> You leave a small margin around the design and sealing it with a satin stitch, zig-zag stitch, or fabric glue.
Not applying enough heat makes the patch peel off
If the adhesive doesn’t melt fully, the patch won’t bond. This makes it peel after light use.
=> Pressing with steady, medium heat for 10–15 seconds. Always use a pressing cloth to protect the embroidery.
Expert Tip: We recommend always testing patch adhesion on a piece of scrap fabric before applying it to your final garment. This helps you find the right heat and timing without risking your finished piece.
=>>> Read more: How to Make Your Own Embroidery Patches
5. Creative Ideas for DIY Iron-On Embroidery Patches
Iron-on embroidery patches are versatile. You can use them to decorate clothing, create gifts, or even promote a brand. Here are some ideas to inspire your next project.
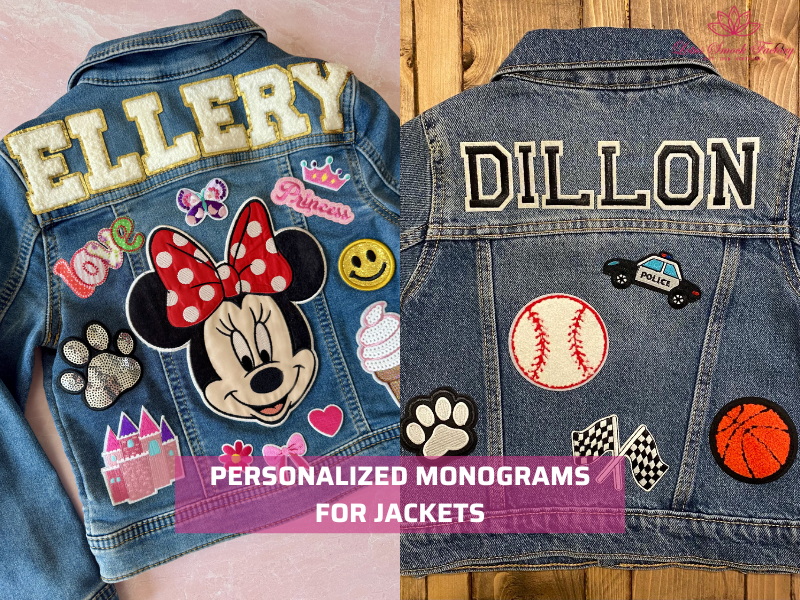
Personalized monograms for jackets
You add initials or embroidery letters to denim or bomber jackets. Monograms give a personal touch and make a jacket feel custom-made. Use bold stitches and contrasting thread so the letters stand out.
Cartoon or flower designs for kids’ clothes
Children’s clothes look fun with bright patches. Cartoon characters or simple flowers work well on shirts, pants, or backpacks. These patches can also cover small stains or holes, giving clothes a second life.
Logo patches for small business branding
Patches are an affordable way for small shops to promote their brand. You create logo patches and apply them to tote bags, hats, or aprons. They also work as add-on items to sell or give away at events.
Seasonal patches (Christmas, Halloween, Easter)
Holiday themes make patches more appealing. You try snowflakes or Santa hats for Christmas, pumpkins or bats for Halloween, and eggs or bunnies for Easter. These designs are easy to swap on clothes and accessories for a festive look. If you like working with heavier fabric, see our tutorial on how to embroider a sweatshirt for designs that last on thicker garments.
DIY patches let you practice embroidery while making items that are personal and useful. With the right fabric and adhesive, these patches can last through many wears and washes.
6. Caring for Your Iron-On Embroidery Patch
Proper care helps your iron-on embroidery patches last longer and stay in place after repeated use. Follow these steps to keep them looking neat:
- Wash inside-out in cold water
You turn the garment inside out before washing. Use cold water to protect the adhesive and thread colors. Gentle washing reduces friction and keeps stitches intact. - Air dry or tumble dry on low heat
High heat can weaken the adhesive. Air drying is safest, but if you use a dryer, keep it on a low setting. This prevents edges from lifting. - Re-iron if edges lift
If you notice edges starting to peel, place a pressing cloth over the patch and press again with medium heat for 10–15 seconds. Let it cool before wearing. - Optional: stitch edges for permanent security
Even though the adhesive holds the patch, sewing a simple border with a satin stitch or backstitch will increase durability. This is especially useful for clothes that are washed often.
By following these steps, your patches will stay secure, and your designs will continue to look sharp through everyday wear.
7. FAQs
7.1. Can I make an embroidery patch without an iron-on backing?
Yes. You can leave the backing off and use your patch as a sew-on version. Sew-on patches are more flexible and often last longer on heavy fabrics. If you prefer, you can also attach them with fabric glue for temporary use.
7.2. How do I remove an iron-on patch?
Place a pressing cloth over the patch and heat it with an iron. As the adhesive softens, peel the patch off gently with tweezers. For leftover glue, apply adhesive remover or reheat the area and wipe it clean. Always test on scrap fabric first to avoid damage.
7.3. Are iron-on patches permanent?
No. Iron-on patches are durable but not fully permanent. Over time, repeated washing may cause edges to lift. For extra security, you can sew around the patch after ironing it in place. This combination makes the patch much longer-lasting.
7.4. Can I use a regular sewing machine for embroidery patches?
Yes. A basic sewing machine can help finish patch edges with zig-zag or satin stitches. For complex designs, an embroidery machine gives cleaner results, but it’s not required. Many patches are made completely by hand with simple stitches.
7.5. What fabric works best for long-lasting patches?
Choose stable fabrics like cotton twill, denim, or felt. These materials are thick enough to support embroidery and adhesive backing. Avoid stretchy knits or sheer fabrics, as they warp, curl, or tear when heat is applied.
8. Final Words
Now you know the steps of how to make an iron on embroidery patch from start to finish. With the right fabric, thread, and adhesive, you can create durable patches for fashion, gifts, or branding. You can try adding initials, flowers, or logos to turn simple clothes into personal items. Begin your first patch today, and explore more tutorials to improve your embroidery skills.
Lotus Smock is a brand of TAQ SERVICE TRADING DEVELOPMENT JSC. In clothing business, we’ve been crafting unique pieces for the domestic market since 2010. We prioritize the quality, so we don’t accept overly big orders. We are committed to producing high-quality products at the best prices. Recently, we have started engaging in social media and marketing to reach international customers, bringing the best products from Vietnam to friends around the world.
Contact Lotus Smock at:
- Facebook: facebook.com/lotussmockfactory
- WhatsApp: +84 83 333 3498
- Youtube: youtube.com/@LotusSmockFactory