How to Make French Knots: 5 Easy Steps For Beginners
A French knot is a small raised stitch made by wrapping embroidery thread around the needle before reinserting it into the fabric. Learning how to make French knots gives your designs texture, depth, and detail. They are often used for flower centers, dotted patterns, and decorative borders on clothing or accessories. Many beginners struggle with this stitch because knots slip through or threads tangle, but the method is easy once you follow the right steps.
In this guide, we’ll learn step by step how to create neat knots and use them in creative projects such as floral embroidery, smocked babywear.
1. What Is a French Knot in Embroidery?
A French knot is a small, raised stitch made by wrapping thread around the needle before reinserting it into fabric. This knot creates a tiny textured dot that stands out from the surface. When you know how to make French knots, you can add detail and dimension to many embroidery projects.
You will often see French knots used in:
- Floral embroidery: flower centers, rose buds, or lavender stems.
- Dotted textures: borders, fillers, or polka-dot patterns.
- Decorative accents: eyes on animals, berries, or small details in designs.
In addition, French knots are often compared to colonial knots. Both create a raised dot, but the method is slightly different.
- A French knot wraps thread in a circle around the needle.
- A colonial knot uses a figure-eight wrap.

Why should beginners know the French knots guide?
Beginners should learn French knots because they are:
- Easy to master with practice.
- Versatile for many designs, from flowers to textured borders.
- Useful for adding depth and interest without needing advanced techniques.
Once you know the method, you can use French knots in both small and large projects, from modern decorative embroidery to seasonal babywear, such as Christmas Smocked Outfits or Easter Smocked Outfits.
2. Tools & Materials You’ll Need
Before you practice how to make French knots, prepare the right materials. The right fabric, thread, and tools make your knots cleaner and easier to control.
2.1. Fabric Choice
The fabric you choose affects how well the knot holds.
- Best fabrics: cotton, linen, and calico. These have a stable weave that grips the thread and keeps knots in place.
- Avoid: stretchy knits or delicate silks. They can let knots slip through or distort the stitch.
Pro tip: You should mark your fabric with a water-soluble pen before stitching. This helps you place knots evenly without leaving permanent marks.
2.2. Thread Selection
Thread type and thickness change the look of your knots.
- Most common: stranded cotton embroidery floss. Use 2–3 strands for a neat, balanced knot.
- Other options: silk thread for a smooth finish or metallic thread for shiny accents.
Note: Thicker threads create larger, more raised knots, while fewer strands give a finer effect.
2.3. Needles & Hoops
The right needle and hoop will help you work with control.
- Embroidery needles with large eyes make threading floss easier.
- Hoop: keeps fabric taut and prevents puckering as you form knots.
Expert tip: We recommend always matching needle size to fabric thickness. A needle that is too small can break the thread, while one that is too large leaves holes in the fabric.
2.4. Additional Essentials
Moreover, you should prepare additional essentials; a few extra tools will make stitching smoother:
- Small embroidery scissors for trimming thread neatly.
- Fabric markers to outline designs and knot placements.
- Stabilizer (optional): useful when working on thin fabrics to prevent slipping.
With these supplies, you’ll have everything you need to practice and perfect your French knots.
3. Step-by-Step: How to Make French Knots
French knots can look tricky, but once you break them into small steps, the process becomes straightforward. Follow this guide to learn how to make French knots neatly and consistently.
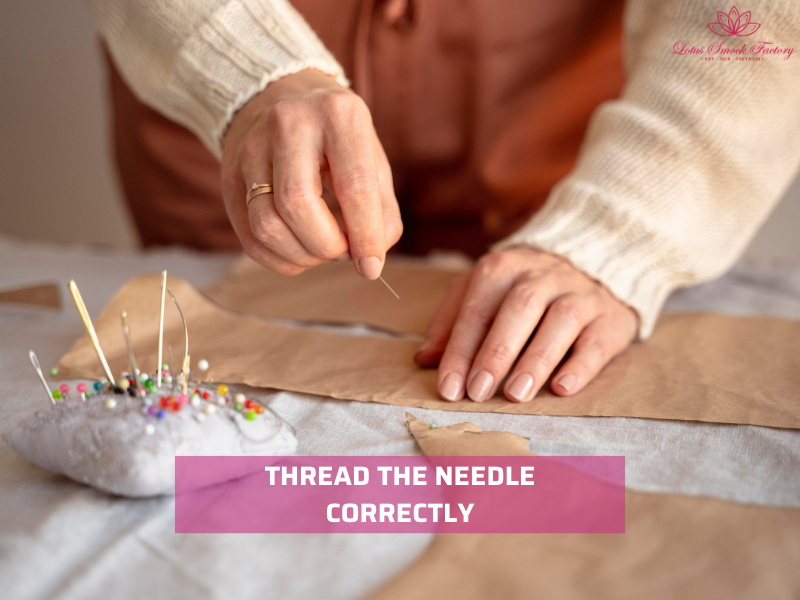
3.1. Step 1: Thread the Needle Correctly
Start by preparing your thread. If the thread is too long, it tangles easily, so keep it short.
- Cut your thread to about 45 cm (18 inches).
- Thread the needle and secure one end with a small knot.
Note: Using shorter lengths helps you keep tension steady and reduces frustration while stitching.
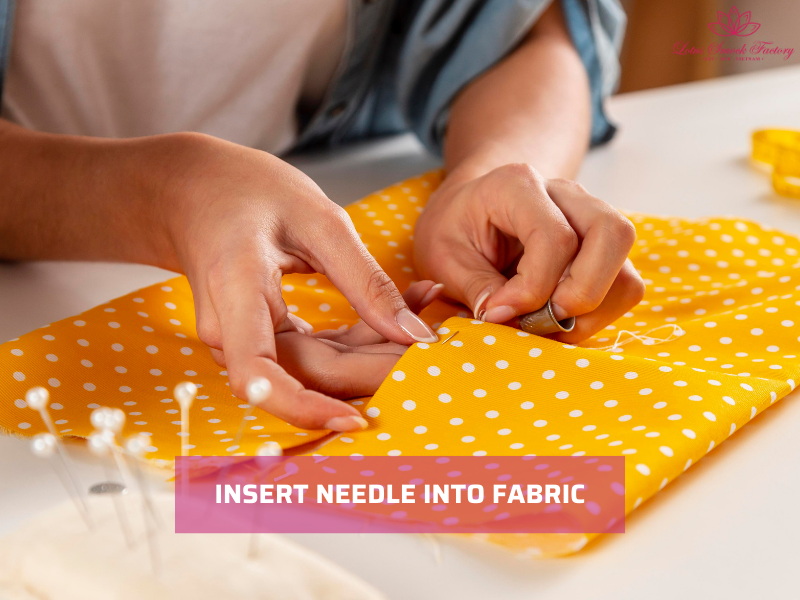
3.2. Step 2: Insert Needle into Fabric
Now decide where you want the knot. Mark the spot with a fabric pen if needed.
- Bring the needle up from the back of the fabric at the marked dot.
- Hold the working thread taut with your non-dominant hand so it does not twist.
This step sets the foundation for the knot and keeps the thread in place as you wrap.
3.3. Step 3: Wrap Thread Around the Needle
The wrap is what forms the knot. More wraps give you a larger knot, while fewer wraps create smaller dots.
- Wrap the thread around the needle 1–2 times for a standard knot.
- Wrap 3–4 times if you want a raised or bolder knot.
Keep the wraps close to the needle tip and hold them steady with your non-dominant hand. If the wraps slip, the knot will loosen.
3.4. Step 4: Reinsert Needle Close to Entry Point
Placing the needle back into the fabric correctly makes the knot hold.
- Insert the needle just next to the original entry point, not in the same hole.
- Keep the thread wraps tight against the needle while you reinsert.
This small adjustment stops the knot from slipping through the fabric. Beginners often make the mistake of pushing the needle into the same hole, which causes the knot to unravel.
3.5. Step 5: Pull Needle Through Slowly
The final step locks the knot in place. Pulling too fast can cause tangles, while too much slack creates loose knots.
- Pull the needle through slowly while keeping tension steady.
- Guide the thread until the knot sits neatly on the surface.
- Release the thread gently once the knot forms.
Pro Tip: If your knot slips through the fabric, check your placement. Always reinsert the needle a fraction away from the starting hole, not directly on it. This small gap anchors the knot securely.
Practicing Your Knots
At first, your French knots may look uneven, but practice quickly improves control. Try stitching rows of dots on scrap fabric. Experiment with different numbers of wraps and strand thickness to see how the size changes.
Once you feel confident, add knots to real projects. Use them as flower centers, scattered textures, or dotted borders. They work beautifully in both traditional floral embroidery and modern textured designs.
4. Common Mistakes & How to Fix Them
Many beginners struggle with French knots at first. Most problems come from thread tension, wrap control, or fabric choice. Here are common mistakes and how you can fix them.
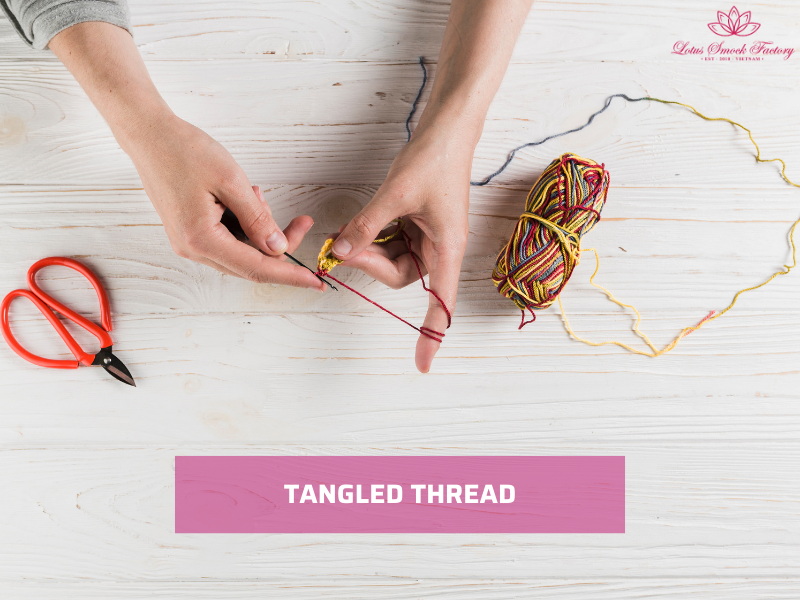
Tangled thread
Long thread lengths twist and knot easily while you stitch.
=> To fix it, you cut shorter lengths, around 45 cm (18 inches). Let the thread untwist naturally by letting your needle dangle now and then.
Loose loops
The knot looks messy when the wraps around the needle are not tight.
=> Solve this by keeping the thread taut with your non-dominant hand while wrapping and inserting the needle.
Flat stitches
Sometimes the knot lies flat on the fabric instead of sitting raised.
=> You should add an extra wrap around the needle. More wraps create a fuller, more textured knot.
Knots pulling through
A knot slips to the back when the needle is pushed into the same hole as the entry point.
=> You solve it by reinserting the needle just a fraction away from the first hole, or by using a fabric with a tighter weave.
Expert experience: If you know these mistakes in advance, you can avoid frustration and make clean, even French knots. With steady practice, they will become one of the easiest stitches in your embroidery projects.
5. Creative Ways to Use French Knots
French knots are small, but they can transform embroidery designs with texture and detail. Once you know how to make French knots, you can use them in different projects for both fashion and décor.
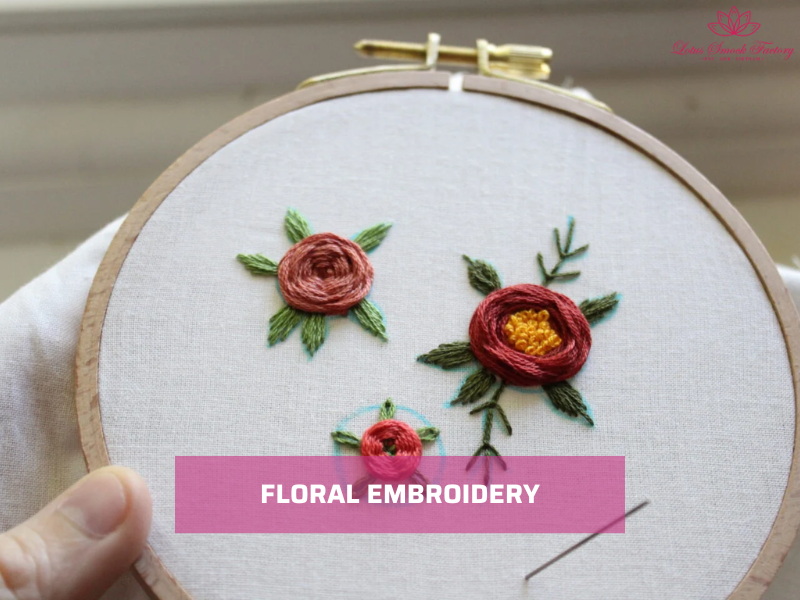
5.1. Floral Embroidery
French knots are a classic choice for floral designs. You can create by:
- Use them as flower centers, rose buds, or accents on lavender stalks.
- Pair them with satin stitch or backstitch petals to build full, realistic flowers.
- They also work well in clusters to create the look of tiny blossoms.
=>>> Read more: How to Embroider Flowers: A Step-by-Step Beginner’s Guide
5.2. Smocked Outfits & Babywear
French knots add charm to handmade or boutique clothing.
- Stitch dotted details along collars, borders, and sleeves for a delicate finish.
- Use them to highlight gathers on smocked panels or to add texture to embroidered patterns.
- They look especially beautiful on seasonal boutique designs such as the Halloween Smocked Outfit or the Smocked Valentine Outfit.
Note: These small knots make children’s clothing look elegant while still playful.
=>>> Read more: How to Embroider on Clothes

5.3. Modern Textured Embroidery
French knots are also popular in contemporary embroidery projects. You can apply in some ways below:
- Create 3D fillers for abstract patterns or backgrounds.
- Use them as polka-dot details or scatter them across borders.
- Mix different knot sizes by changing thread thickness or wrap count. This creates depth and variation in your designs.
Tips: Adding texture in this way makes embroidery more eye-catching and modern.
5.4. Caring for Embroidery with French Knots
French knots add texture to fabric, but they need gentle care to stay neat after washing. You should follow these steps to keep your embroidery looking clean and intact.
Wash gently
Hand washing is the safest method. If you use a machine, place the garment inside a laundry bag and use a delicate cycle with cold water. This reduces friction and protects the raised knots.
Air dry flat
You lay the fabric flat on a towel to dry. Hanging it can stretch the fabric and loosen knots. Avoid high heat from dryers, which may weaken the thread.
Press with a cloth
If ironing is needed, place a thin cloth between the iron and the embroidery. Press lightly from the reverse side. Do not slide the iron over the knots, as this can flatten them.
Check knots regularly
After each wash, look over your embroidery. If a knot loosens, reinforce it by adding a new stitch in the same spot. This keeps your design strong over time.
With the right care, embroidery with French knots can last through many washes while keeping its raised, textured look.
6. Frequently Asked Questions
6.1. How many wraps should I use for French knots?
Most French knots use 1–2 wraps for neat, small dots. If you want a larger or raised knot, wrap 3–4 times. More than that can make the knot bulky and harder to control.
6.2. Why do my French knots unravel?
This usually happens when you insert the needle into the same hole where you first came up. Always reinsert just a fraction away from the entry point to anchor the knot properly.
6.3. Can I use French knots on stretchy fabric?
Yes, but you need to support the fabric. Place a stabilizer behind the area so the fabric does not stretch or distort. This keeps the knots secure.
6.4. What’s the difference between French knots and colonial knots?
Both create small raised dots. The French knot wraps thread around the needle in a circular motion. The colonial knot uses a figure-eight wrap. Many stitchers find the colonial knot slightly more stable, but both look very similar on fabric.
6.5. Do I need a hoop for French knots?
A hoop is highly recommended because it keeps fabric taut. Tension makes the wraps stay tight against the needle and helps the knot form neatly.
For more basics on stitches and techniques, you can also read our guide on how do you do embroidery.
7. Final Words
Now you know the steps of how to make French knots and how to keep them neat. Start with short threads, practice steady wraps, and place the needle slightly off the first hole to prevent slipping. Moreover, let’s try adding dots to flowers, borders, or baby outfits to see how this stitch changes a design.
Pick one piece of fabric today, practice a few knots, and then move to a real project. When you are ready, explore related tutorials like how to embroider flowers or how to do embroidery to expand your skills.
Lotus Smock is a brand of TAQ SERVICE TRADING DEVELOPMENT JSC. In clothing business, we’ve been crafting unique pieces for the domestic market since 2010. We prioritize the quality, so we don’t accept overly big orders. We are committed to producing high-quality products at the best prices. Recently, we have started engaging in social media and marketing to reach international customers, bringing the best products from Vietnam to friends around the world.
Contact Lotus Smock at:
- Facebook: facebook.com/lotussmockfactory
- WhatsApp: +84 83 333 3498
- Youtube: youtube.com/@LotusSmockFactory