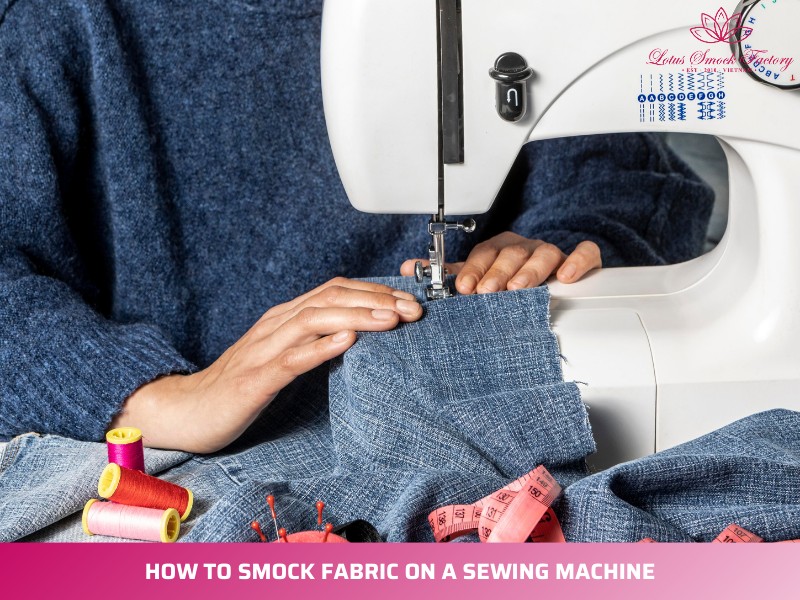
How to Smock Fabric on a Sewing Machine: Step-by-Step Guide
How to smock fabric on a sewing machine? Smocking is a classic sewing method that adds stretch and beauty to fabric. Today, you can smock fabric on a sewing machine with just a few settings and simple tools. Many beginners want the smocked look but feel unsure about how to start.
This guide explains smock fabric on a sewing machine step-by-step guide. You will see how it works, what tools you need, and how to avoid mistakes. Keep reading to learn a method that makes your sewing faster and your clothes look more professional.
1. Overview of Smocking vs Shirring
When you learn how to smock fabric on a sewing machine, you will often see another shirring method like smocking. Both look similar at first, but they are not the same. Smocking and shirring use different methods, give different results, and work best for different parts of a garment.
1.1. What Is Smocking?
Smocking is a decorative embroidery technique worked over evenly spaced pleats. Traditionally done by hand, it used embroidery stitches to hold pleats in place. Today, modern sewing machines can replicate some of these patterns with the right settings.
Smocking is both functional (it adds flexibility without elastic) and aesthetic (it creates detailed surface patterns).
You often see smocking in:
- Bodices of dresses
- Cuffs and sleeves
- Waistbands
- Baby and children’s clothing
Smocking fabric by hand gives a premium look, but it takes time. Using a sewing machine makes the process faster while keeping the decorative effect.
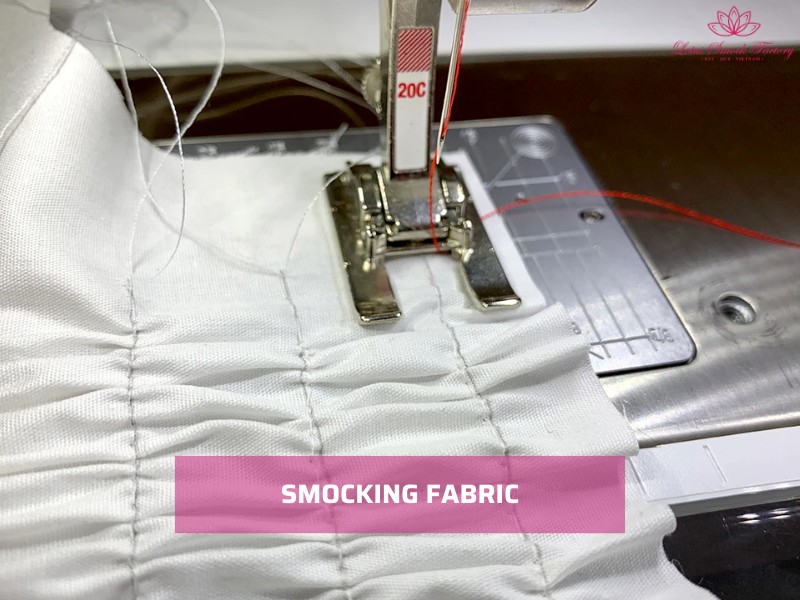
Smocking is a decorative embroidery technique
1.2. What Is Shirring?
Shirring is gathering fabric with elastic thread in the bobbin of your sewing machine. The top thread is normal, but the elastic bobbin thread pulls fabric into soft gathers. This creates stretch and comfort, which smocking by hand cannot provide.
Shirring is quick and efficient, making it popular in casual wear and ready-to-sew projects.
You will find shirring in:
- Waistbands of skirts and dresses
- Casual tops
- Summer bodices
- Everyday children’s wear
Shirring is functional and gives instant stretch but does not create the detailed embroidery effect of smocking.
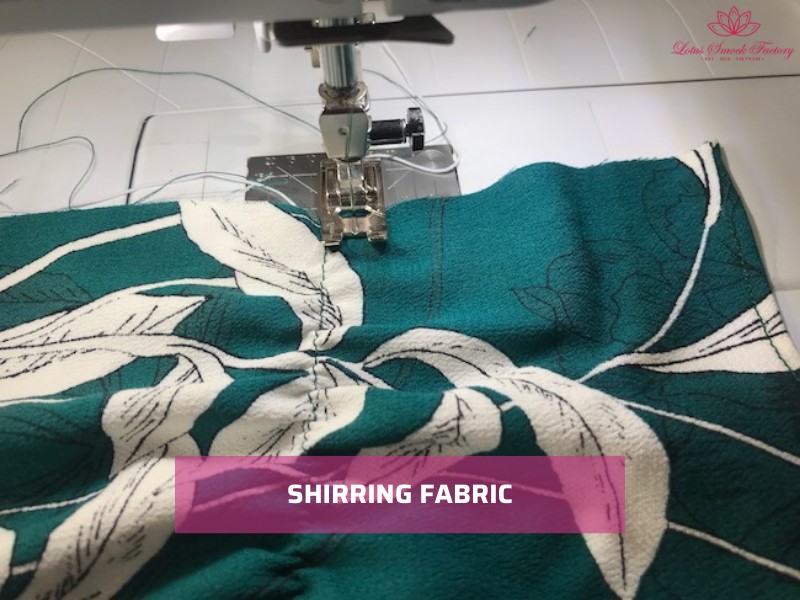
Shirring is gathering fabric with elastic thread
1.3. The Difference
The two techniques create different results:
- Smocking: Decorative stitches on pleats. Less stretch, more design detail.
- Shirring: Elastic thread gathers. More stretch, less visual decoration.
Experience insight: In the smocked outfit production process for occasions like Easter, Christmas, and Fourth of July, we often combine both. For example, we use shirring at the back of a dress for comfort and smocking at the front for visual impact. This method makes the garment easier to wear while still looking refined.
2. Tools and Materials You Need for Machine Smocking
Before you start learning how to smock fabric on a sewing machine, you need the right tools and materials. Each item plays a role in how neat and durable your smocking will look.
| Item | Why You Need It | Tips for Best Results |
| Cotton Lawn | Light, breathable, and holds pleats evenly. | Works well for summer dresses and children’s outfits. |
| Voile | Sheer and soft, gives a delicate finish. | Popular for boutique baby clothes in the UK market. |
| Poplin | Slightly heavier, durable, and crisp. | Best for structured smocked panels or holiday outfits. |
| Elastic Thread | Used in the bobbin for shirring effect. | Wind by hand to keep it loose; always test on scraps. |
| Embroidery Thread | Adds decorative stitches to pleats. | Choose contrasting colors to highlight patterns. |
| Marking Tools | Water-soluble pens or fabric chalk for even spacing. | Double-check markings; a 2 mm shift can affect the design. |
| Presser Feet | Helps guide stitches and maintain consistency. | Use a walking foot for even fabric feeding. |
Expert tips: Always pre-wash fabric before smocking. Fabric can shrink or shift after steaming or washing, which may ruin your pleats. Pre-washing keeps your final garment true to size and shape.
3. Method 1: Shirring with Elastic Thread for a Smocked Look
Shirring is the fastest way to get the “smocked effect” using a sewing machine. Instead of hand embroidery, you use elastic thread in the bobbin to gather fabric evenly. Follow these steps to create neat and stretchy panels.
3.1. Step 1: Mark and Prepare Your Fabric
First, start with clean, pre-washed fabric. Accurate marking sets the foundation for even shirring.
- Begin by using a water-soluble pen or fabric chalk to draw parallel lines across the fabric.
- Then, space the lines about 1–1.5 cm apart (closer for tighter gathers, wider for looser ones).
- Finally, check that the lines stay straight and consistent.
Tip: Even a 2 mm marking inconsistency can show in the finished gathers, so take time to measure carefully.

Mark and prepare your fabric
3.2. Step 2: Wind the Bobbin with Elastic Thread
Next, prepare your bobbin. Elastic thread must go in the bobbin, not the top spool.
- Start by winding the bobbin by hand, keeping the tension loose.
- Make sure not to stretch the elastic while winding, or your fabric will not gather.
- Once ready, place the bobbin in the case as usual.
Tips: If the elastic feels too tight, simply unwind and redo it, a loosely wound bobbin produces smoother gathers.
3.3. Step 3: Adjust Your Sewing Machine Settings
After preparing the bobbin, you need to adjust your machine. Settings control how much the fabric gathers.
- Use regular thread on top and elastic thread in the bobbin.
- Set the stitch length to 3–4 mm for best results.
- Then, slightly reduce the top thread tension to prevent snapping.
- Always test on a scrap of the same fabric before sewing the real panel.
Tips: Many boutique makers run 2–3 test rows on scraps to fine-tune stitch length and tension.
3.4. Step 4: Stitch the Rows
Now you are ready to sew the shirring rows.
- Begin with the first row along your marked line.
- As you sew, keep the fabric flat and avoid stretching it.
- For the next row, line up the presser foot against the previous row for even spacing.
- Continue row by row until you cover the desired width.
Remember: the more rows you sew, the tighter and more textured the shirring will look.
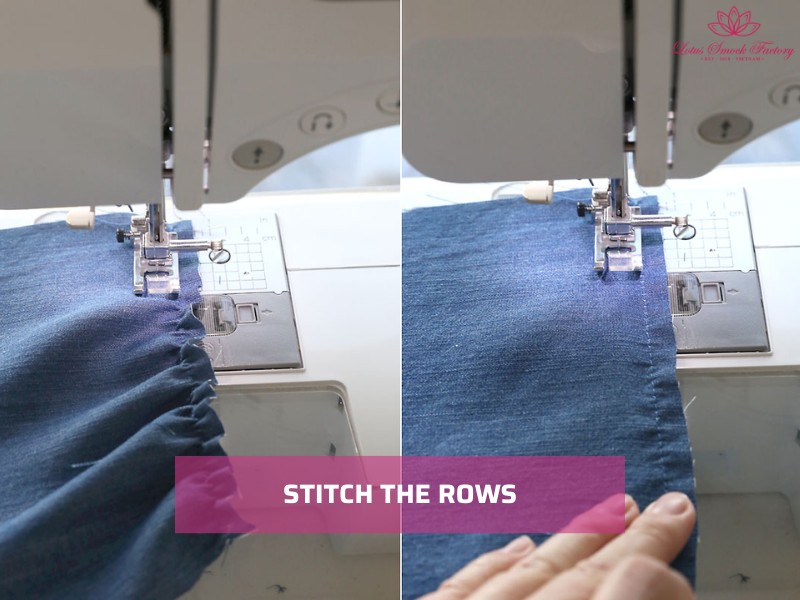
Stitch the Rows
3.5. Step 5: Finish and Set the Gathers
Finally, you need to set the shirring so it stays in place.
- Lightly press the shirred area with a steam iron.
- The steam shrinks the elastic slightly, tightening the gathers.
- Be careful not to press too hard; let the steam do the work.
- At the end, secure the thread by tying knots or backstitching.
Note: Once steamed, the shirring will hold its shape and stay durable after washing.
4. Method 2: Decorative Smocking Stitches on Pleated Fabric
While shirring gives you stretch, decorative smocking adds the visual beauty many people look for in boutique garments. Instead of relying only on elastic, you stitch directly over pleated fabric to form neat patterns. Here’s how to do it.
4.1. Step 1: How to Pleat Fabric Evenly
First, you must pleat the fabric. Without even pleats, decorative stitches will not line up.
- Mark the fabric with even dots or grid lines using a water-soluble pen.
- Gather the fabric manually with long basting stitches or use a pleater machine for speed.
- Secure the pleats with temporary gathering threads so they stay straight as you stitch.
Tip: Always cut your fabric at least 30–40% wider than the final panel. Smocking reduces the width as pleats pull the fabric together.
4.2. Step 2: Choosing Decorative Stitches
Next, decide which stitch patterns you want. Most modern sewing machines include decorative stitches that can mimic traditional hand-smocking designs.
- Honeycomb stitch: Creates a diamond-shaped pattern. Good for children’s outfits and soft panels.
- Cable stitch: Rope-like effect. Works well for structured bodices or cuffs.
- Wave stitch: Produces scalloped lines. Ideal for festive or holiday smocked outfits.
Note: Many boutique makers test several stitches on scraps before applying them to a garment panel.
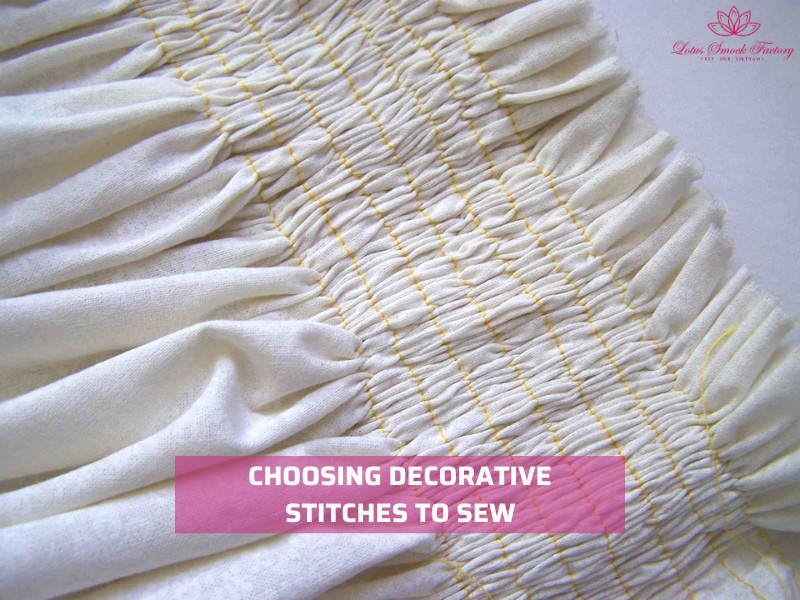
Choosing decorative stitches to sew
4.3. Step 3: Adjusting Stitch Density for Different Fabrics
After choosing your stitch, you must adjust the density. The wrong settings can make the fabric stiff or uneven.
- For light fabrics like cotton lawn or voile, use shorter stitches and lighter thread tension.
- For medium fabrics like poplin, lengthen the stitch slightly and check bobbin tension.
- For heavier fabrics, increase spacing between rows so the smocking does not feel bulky.
Note: Always test first. A small change in stitch length or tension can transform the final look.
5. Troubleshooting Common Machine Smocking Problems
Even with the right tools, machine smocking can be tricky the first time. Most problems come from tension, marking, or spacing. Use the table below to find the problem, the likely cause, and the fix.
| Problem | Likely Cause | Solution |
| Rows not gathering | Elastic thread wound too tight on the bobbin | Rewind the bobbin by hand with less tension. Set a longer stitch length (3–4 mm) so the fabric can gather more naturally. |
| Uneven gathers | Marking is not consistent or fabric slipped under the presser foot | Re-measure your grid lines. Pin or baste the fabric edges before stitching. Adjust presser foot pressure if the fabric is dragging. |
| Thread snapping | Top thread tension set too high or needle too fine | Reduce the top tension slightly. Switch to a stronger needle such as size 90/14 for elastic thread. |
| Over-gathered fabric | Too many rows stitched too close together | Increase the spacing between rows (at least 1 cm for light fabrics). Reduce the total number of rows until the fabric lies flatter. |
Expert Recommendation: Always test first. Before you sew the actual garment, stitch at least 2–3 test rows on the same fabric. This lets you fine-tune stitch length and tension without wasting your main fabric.
6. Ready-to-Sell Smocked Outfits from Lotus Smock
Not every boutique owner has time to make smocked panels or experiment with sewing machine settings. If you want the look of traditional smocking without the production work, you can source finished outfits directly from Lotus Smock.
We design and supply seasonal smocked collections for boutiques in the US and UK, with ready-made pieces for every key occasion:
- Christmas Smocked Outfit: Classic reds and greens with embroidered holiday motifs.
- Easter Smocked Outfit: Soft pastels and bunny or cross details perfect for spring.
- Halloween Smocked Outfit: Orange-and-black themes with playful pumpkins or spooky icons.
- Fourth of July Smocked Outfit: Patriotic red, white, and blue styles for summer.
- Smocked Valentine Outfit: Sweet hearts and romantic colors for February displays.
- St. Patrick’s Day Outfits: Shamrock designs in green tones that stand out in March.
You can check the full list of new collections for each occasion HERE.
7. Why Lotus Smock Stands Out
Here’s why many resellers and boutique owners trust Lotus Smock:
- Lotus Smock specializes in boutique-quality garments with consistent stitching and premium fabrics.
- Each piece is made to fit US and UK markets, reflecting customer style preferences.
- Our collections are designed for resale, helping boutique owners stock seasonal favorites without handling production.
Note: If you’re a new boutique owner, importing smocked outfits from Lotus Smock saves you time, reduces risk, and gives your shop a ready-made seasonal advantage.

Lotus Smock – the best supplier of smock dresses
Contact Lotus Smock at:
- Facebook: facebook.com/lotussmockfactory
- WhatsApp: +84 83 333 3498
- Youtube: youtube.com/@LotusSmockFactory
8. FAQs
- Can you smock knit fabrics?
Yes, you can. Use lighter elastic thread in the bobbin and set longer stitches on your machine. Knits stretch more than cotton, so lighter tension helps avoid puckering. Always test a small piece before sewing the main garment.
- How many rows do you need for a child’s bodice?
Most bodices need 8–10 rows of smocking. The exact number depends on the child’s chest size and the style of the dress. Space the rows evenly, usually about 1 cm apart, to create a balanced look.
- Is machine smocking as durable as hand smocking?
When you use quality elastic thread and the right stitch density, machine smocking can last for years. Hand smocking has more detail, but machine smocking holds up well in daily wear and washing. For boutique outfits, many makers combine both for comfort and design.
Final Words
Now you know how to smock fabric on a sewing machine with both shirring and decorative stitches. The technique gives you comfort, style, and a handmade look in less time. Start with a small test piece and practice a few rows before moving to full garments.
Once you see how the gathers form, you can apply smocking to dresses, rompers, or seasonal boutique outfits. Try it today and enjoy creating designs that look professional yet stay personal to your style.