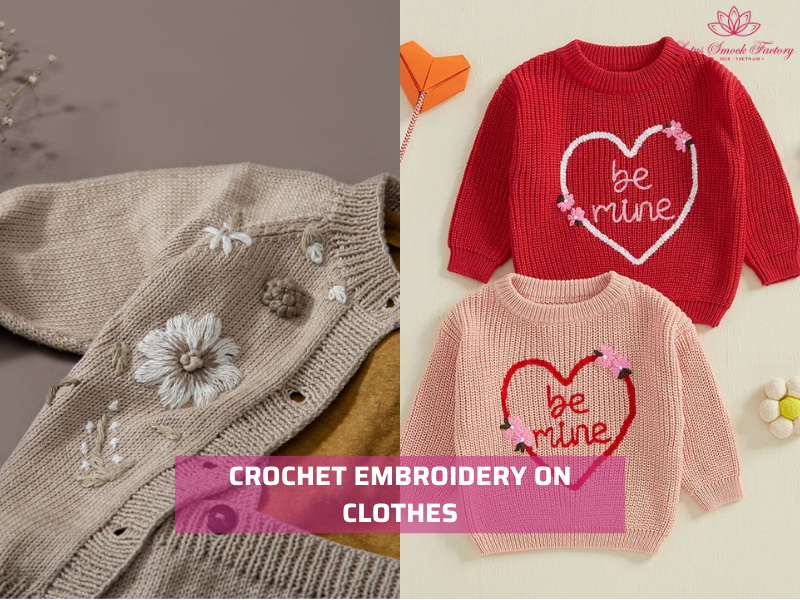
How to Crochet Embroidery with Simple Tools and Stitches
How to crochet embroidery? The answer is simple: you stitch decorative designs on top of crochet fabric using embroidery stitches or surface crochet techniques. Crochet embroidery is a method that adds colour, detail, and texture to blankets, clothes, and accessories. But beginners often face problems like thread slipping through gaps, uneven stitches, or fabric pulling. With the right base fabric and simple stitches, you can fix those issues easily.
In this guide, you will learn tools to use, step-by-step methods, common mistakes to avoid, and creative ideas for your projects. Keep reading and try crochet embroidery on your next piece.
1. What Is Crochet Embroidery?
Crochet embroidery is a method where you stitch decorative patterns on top of crochet fabric. You use a crochet hook or a needle to pull yarn or thread through existing stitches and form designs. This is also called surface crochet because the decoration sits on the surface of the crochet piece.
Crochet embroidery gives you several benefits:
- Adds colour, texture, and detail to plain crochet fabric.
- Turns simple projects into more personal items.
- Works with small or large designs, depending on your skill.
You can use crochet embroidery in many projects:
- Flowers or vines on blankets and scarves.
- Monograms or initials on clothes and bags.
- Eyes, mouths, or accents on crochet toys and amigurumi.
Some people use the term surface crochet instead of crochet embroidery. Both describe working decorative stitches on top of crochet fabric. The difference is that surface crochet usually uses slip stitches with a hook, while crochet embroidery can also use a needle and thread to create more varied stitches.
Why should you learn crochet embroidery? The method is simple and flexible. Beginners can start with outlines or monograms on flat fabric. Moreover, boutique crafters can use it to add detail that increases the value of handmade products.
2. Tools & Materials You’ll Need for Crochet Embroidery
The right tools make crochet embroidery easier and help your stitches stay neat. The table below explains each category in detail.
| Category | Options & Details | Quantity / Tips |
| Crochet Base | – Best base: single crochet (sc) or half-double crochet (hdc) fabrics. They are dense and stable. – Avoid loose lace or openwork crochet. Embroidery thread slips through gaps and looks uneven. | Prepare a 20 × 20 cm swatch for practice before working on your main project. |
| Needles & Threads | – Tapestry needle with a large eye, blunt tip (size 18–24 depending on yarn). – Embroidery floss (6-strand cotton) for fine work. – Wool yarn or perle cotton for thicker textures. – Choose matching colours to blend or contrasting colours to stand out. | Keep at least 2–3 needles in case one bends. Start with 2–3 skeins of floss or small balls of yarn in different colours. |
| Hoops & Stabiliser (Optional) | – Use a 10–15 cm embroidery hoop for small motifs. It keeps fabric flat and prevents puckering. – For thin crochet, add fusible stabiliser or a piece of backing fabric to stop stretching. | Use hoops only for flat projects (squares, panels). For 3D items like toys, hold fabric by hand. |
| Other Essentials | – Fabric markers or water-soluble pens for sketching designs. – Small sharp scissors for trimming thread close to stitches. – Thimble for extra pressure when working with thick yarn or dense crochet. | 1 marker, 1 pair of scissors, and 1 thimble are enough for most projects. Replace markers once ink dries out. |
3. Step-by-Step: How to Crochet Embroidery
Crochet embroidery looks complex, but you can achieve clean results by working step by step. Follow these four stages to prepare your project, add stitches, and finish neatly.
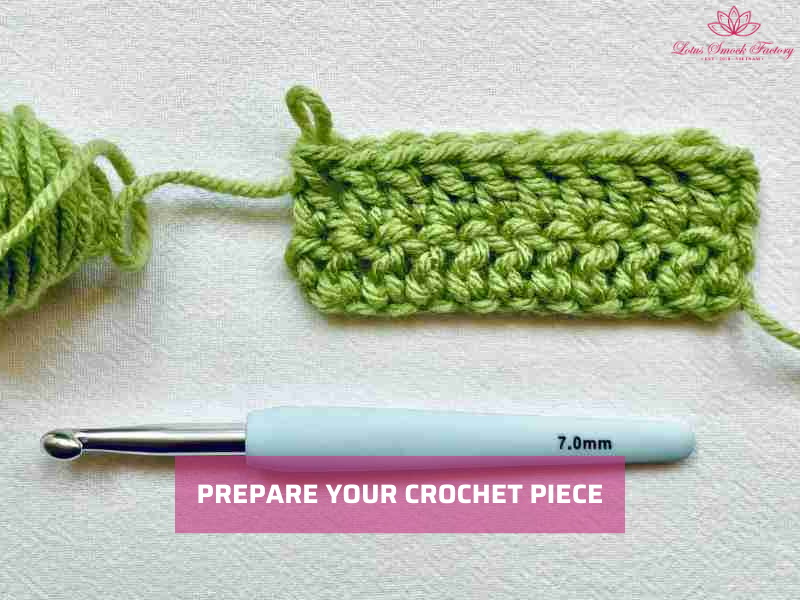
3.1. Step 1: Prepare Your Crochet Piece
Start with a flat and stable crochet base.
- Block your project before stitching. Wet block or steam block it so the fabric lies flat. A stable surface prevents stretching when you add embroidery.
- Decide where to embroider. You can work in the center of a square, along the border, or on a corner. Smaller areas are easier for beginners.
- Sketch your design using chalk or a water-soluble pen directly on the crochet fabric. Simple shapes like flowers or letters are easier to follow.
Pro Tip: You should choose tighter stitches such as single crochet (sc) or half-double crochet (hdc) as your base. Open stitches like double crochet leave gaps, and embroidery thread can slip through them.
3.2. Step 2: Choose Embroidery Stitches for Crochet
Some stitches sit better on crochet fabric than others. Beginners should focus on simple stitches that are stable and easy to control:
- Backstitch: best for outlines, borders, or lettering.
- Satin stitch: covers shapes like petals, leaves, or bold designs.
- Chain stitch: adds raised lines, perfect for vines or decorative borders.
- French knots: small raised dots that work well for flower centers or accents.
You use a tapestry needle with a large eye. Choose embroidery floss, wool, or perle cotton that matches the weight of your crochet fabric. If the thread is too thin, it will sink into the stitches. If it is too thick, it may distort the base.
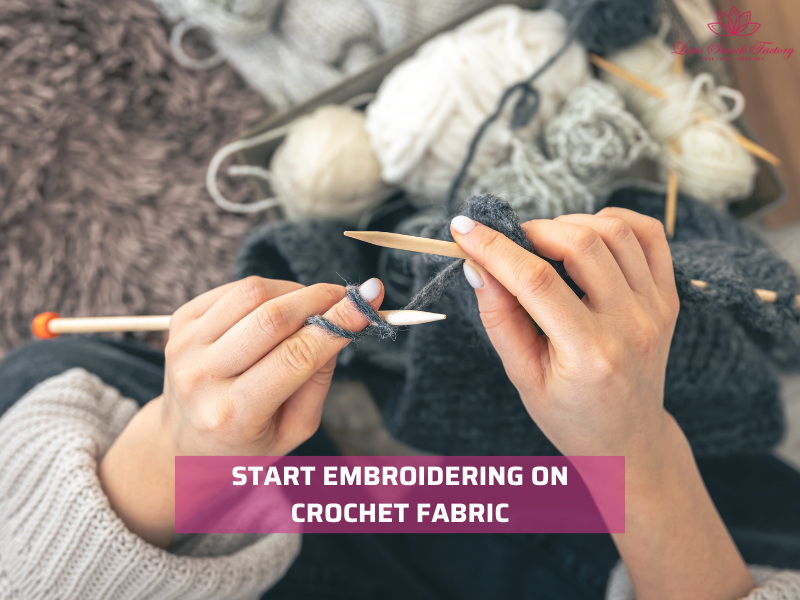
3.3. Step 3: Start Embroidering on Crochet Fabric
Now you can begin stitching your design.
- Bring the needle up through the loop of a crochet stitch instead of pushing it between open spaces. This gives the thread a firm anchor.
- Keep even tension on the thread. Pulling too tightly will pucker the crochet fabric. Leaving it loose will make stitches sag.
- Work slowly and check your design section by section. If a stitch looks uneven, remove it and redo it before moving forward.
Pro Tip: We recommend that you cut shorter lengths of embroidery floss (30–40 cm). Long strands tangle and wear out quickly when pulled through yarn stitches.
3.4. Step 4: Build and Finish the Design
Once your base stitches are in place, you can layer details for depth.
- Add layers for dimension. For example, make petals with satin stitch and finish the center with a French knot.
- Create monograms by outlining letters with backstitch and filling them with satin stitch.
- Secure thread ends by weaving them through 3–4 nearby crochet stitches on the back. This prevents unraveling after washing.
- Trim neatly and smooth the surface with your hand so the embroidery lies flat.
With practice, you can expand from small accents to larger patterns. Crochet embroidery works well on blankets, sweaters, toys, and home décor. Start with simple designs and build your confidence step by step.

=>>>> Read more: How to Embroider a Sweatshirt: Step-by-Step Guide for Beginners
4. Common Mistakes in Crochet Embroidery (And How to Fix Them)
Crochet embroidery is simple once you practice, but beginners often face small problems that affect the look of the design. Below are common issues and how you can fix them.
Thread slipping through gaps
When embroidery thread sinks into the crochet fabric or falls between holes, the design looks broken. This happens most often on open stitches like double crochet or lace patterns.
⇒ You choose a base with tighter stitches, such as single crochet or half-double crochet. Dense fabrics give the thread a firm anchor.
Uneven stitches
Lines or shapes look crooked when stitches are not the same size. This comes from stitching freehand without a clear guide.
⇒ Fix it by marking the fabric with chalk or a water-soluble pen before you begin. Follow the guide as you work to keep your stitches straight and balanced.
Fabric puckering
If you pull thread too tightly, the crochet fabric gathers and loses its flat shape. Puckering makes the design look stiff instead of smooth.
⇒ You fix it by keeping even tension and, if needed, using an embroidery hoop. For very thin crochet, add a stabiliser or backing fabric to keep the surface firm.
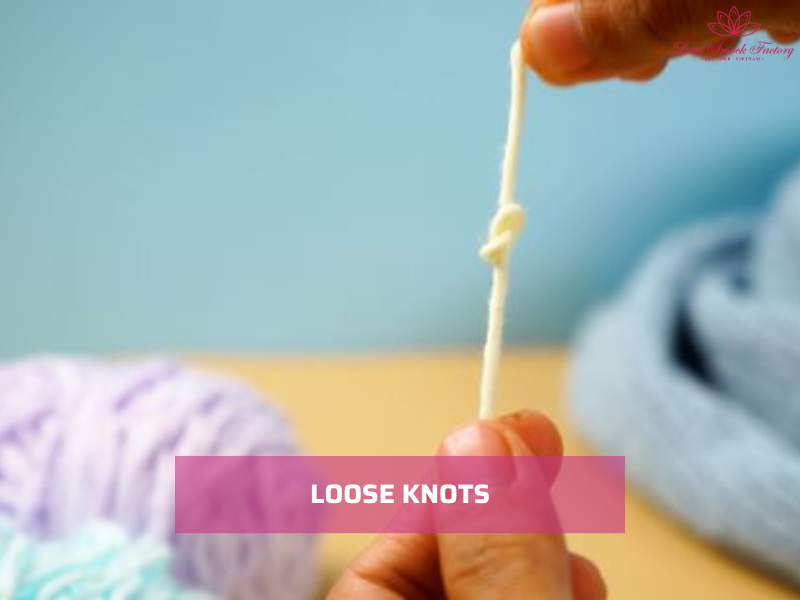
Loose knots
Knots that are not secure will undo over time, and beads or stitches may come loose after washing.
⇒ To fix it, you should type a double knot when you start and finish. Weave thread ends through 3–4 nearby crochet loops on the back to lock them in place.
5. Creative Ways to Use Crochet Embroidery
Crochet embroidery is flexible and works on many types of projects. You can add small details or create full patterns that make handmade items more personal. Here are some ideas to try.
Monograms & Letters
Letters and initials are an easy way to personalise crochet projects. You can add names to baby blankets, monograms to sweaters, or initials to tote bags. A simple backstitch works for outlines, while satin stitch fills bold letters. Monograms are practical for gifts and small business products.
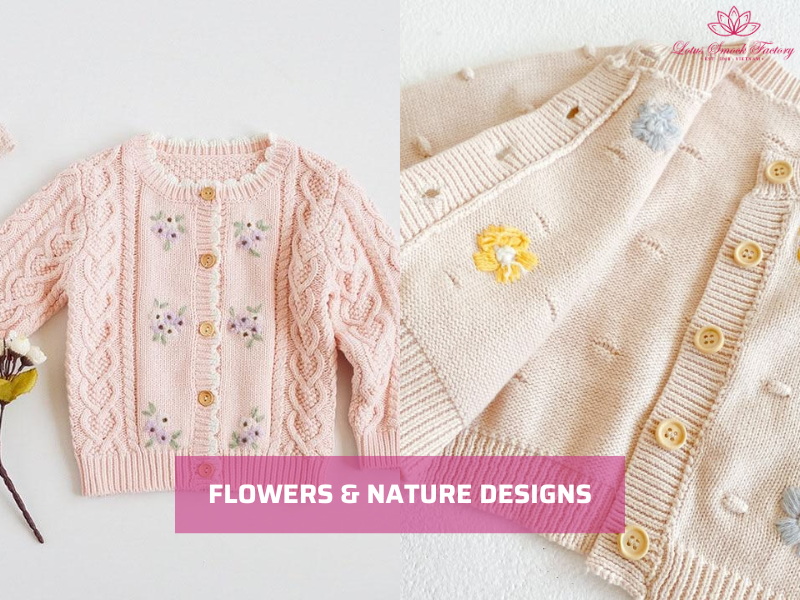
Flowers & Nature Designs
Floral motifs add charm and texture to crochet pieces. You can embroider daisies on baby blankets, roses on scarves, or vines around hats. These designs stand out well on single crochet or half-double crochet bases.
If you want more floral techniques, see our guide on how to embroider flowers.
Amigurumi & Toys
Crochet animals and dolls become more expressive with embroidery details. You can add eyes, smiles, or decorative accents like freckles and lashes. Beads or French knots work for eyes, while backstitch defines shapes.
For clothing detail inspiration, see our tutorial on how to embroider a sweatshirt.
Borders & Accents
Borders frame a crochet project and give it a polished finish. Chain stitch vines along a scarf edge, small flowers on collars, or simple accents on cuffs. For home décor, you can add embroidered trims on cushion covers or table runners. These small touches elevate simple designs without much extra time.
6. Caring for Crochet Embroidery
Crochet embroidery looks best when you treat it gently. Washing, drying, and pressing need extra care so the fabric stays flat and the stitches remain secure.
- Wash by hand or gentle machine cycle
Hand washing in cold water with mild soap is the safest option. If you use a machine, place the item in a mesh laundry bag and select a gentle cycle. This protects the embroidery from rubbing against other fabrics. - Air dry flat
Do not hang crochet embroidery. Hanging may stretch the fabric and pull stitches out of shape. You lay the piece flat on a clean towel and reshape it while damp. Let it air dry naturally. - Press lightly with a cloth barrier
If you need to iron, always press from the back. You place a thin cotton cloth between the iron and the crochet fabric. After that, you use low to medium heat and avoid steam, which can loosen stitches.
Expert Tip
Textile experts recommend weaving thread ends at least 3–4 cm through nearby crochet loops. This extra step keeps embroidery secure during repeated washes and increases long-term durability.
7. FAQs About Crochet Embroidery
7.1. Can you embroider on any crochet stitch?
Yes, but some stitches work better than others. Single crochet and half-double crochet create a dense surface that holds embroidery well. Loose stitches like double crochet or lace patterns often leave gaps, which makes thread slip through.
7.2. What thread works best for crochet embroidery?
Embroidery floss, perle cotton, and lightweight wool yarn all work well. Match thread thickness to the base fabric: use fine floss for delicate pieces and thicker yarn for bold designs. You can also choose matching colours to blend in or contrasting colours for stronger accents.
7.3. Do you need a hoop to embroider on crochet?
A hoop is optional. It helps keep flat pieces stable, such as squares or panels. For 3D projects like toys or clothing, many people prefer to hold the crochet fabric in their hands. If your fabric stretches too much, you can add a stabiliser or light backing.
7.4. Can beginners learn crochet embroidery easily?
Yes. Beginners can start with simple stitches like backstitch, chain stitch, or French knots. These stitches sit neatly on crochet fabric and do not require advanced skills. With practice, you can move to more detailed patterns such as flowers or monograms.
7.5. Is crochet embroidery washable?
Yes, but it needs gentle care. Hand wash or use a gentle machine cycle with a mesh laundry bag. Lay the item flat to dry and avoid hanging, which may stretch the fabric. Press lightly from the back with a cloth barrier if needed.
8. Final Words
Now you know the basics of how to crochet embroidery and why it makes crochet projects more personal. With a few stitches and the right thread, you can turn plain crochet into something colourful and textured. Start with small accents like flowers or initials, then try borders or full patterns once you feel confident.
Remember to use tighter crochet stitches as a base to stop the thread from slipping. Pick a simple design, prepare your yarn, and begin today. Try it now and see your crochet pieces stand out.
Lotus Smock is a brand of TAQ SERVICE TRADING DEVELOPMENT JSC. In clothing business, we’ve been crafting unique pieces for the domestic market since 2010. We prioritize the quality, so we don’t accept overly big orders. We are committed to producing high-quality products at the best prices. Recently, we have started engaging in social media and marketing to reach international customers, bringing the best products from Vietnam to friends around the world.
Contact Lotus Smock at:
- Facebook: facebook.com/lotussmockfactory
- WhatsApp: +84 83 333 3498
- Youtube: youtube.com/@LotusSmockFactory