How to Embroider a Cap: Step-by-Step Guide for Beginners
How to make my cap more special? The answer is simple: you embroider designs onto baseball caps, snapbacks, or dad hats by hand or with a machine. Cap embroidery allows you to add initials, floral motifs, or logos and turn an ordinary accessory into something personal. Many beginners face problems such as curved crowns, thick seams, and stiff brims, but these challenges are easily solved with the right steps.
In this guide, you will learn the specific how to embroider cap by hand, and machine methods, fixes for common mistakes, and creative design ideas.
1. Why Embroider a Cap?
Embroidering a cap is a simple way to customise everyday accessories. A plain baseball cap, snapback, or dad hat can turn into something personal with just a few stitches. Here’s why:
- Affordable customisation
Embroidery lets you refresh an old cap without buying a new one. All you need is a needle, thread, and stabiliser. - Flexible designs
You can add initials, floral designs, or logos. Small accents on the side brim look subtle, while larger designs on the crown stand out. - Value for sellers
For small business owners or e-commerce platform sellers, embroidered caps can be sold as custom merchandise. Personalisation adds appeal to buyers. - Beginner-friendly project
A cap is smaller than clothing items like jackets or bags. Once you know the steps, you can embroider other specific items.
2. Tools & Materials You Need for Cap Embroidery
The right tools can make embroidering a cap much easier. The table below shows what to prepare and how to use them.
| Category | Tools & Options | Quantity / Notes |
| Needles & Threads | – Hand embroidery needles (sizes 5–9). – Machine needles: ballpoint (size 75/11) for knit caps, denim needles (size 90/14) for structured caps.
– Threads: cotton embroidery floss (for hand work), polyester embroidery thread (machine use), or heavy-duty thread for thicker fabrics. |
Keep 3–5 needles ready as they may bend or break on seams.
Use 2–3 skeins of floss for small projects. One 500 m spool of polyester thread covers several caps. |
| Stabilisers & Hoops | – Cut-away stabiliser for knit caps (beanies).
– Tear-away stabiliser for structured caps (baseball or snapbacks). – Hoops: specialty cap hoop for machines, small 10–12 cm hoop for soft hats, or hoopless method with stabiliser for stiff crowns. |
Cut stabiliser squares about 20 x 20 cm per design area.
One roll (25–30 sheets) is enough for multiple hats. |
| Other Essentials | – Fabric pen or chalk for marking design placement.
– Small embroidery scissors (curved tips recommended for tight areas). – A thimble to push the needle through thick seams when working by hand. |
One marker and one pair of scissors are enough.
Keep a metal or leather thimble for heavy fabrics. |
3. How to Embroider a Cap by Hand (Step-by-Step)
Hand embroidery on a cap may look tricky, but breaking it into clear steps makes it much easier. Follow this process to prepare your cap, add stitches, and finish neatly.
3.1. Step 1: Prepare the Cap
Preparation sets the foundation for clean embroidery. A smooth, marked surface helps you keep stitches even and the design balanced.
- Wash and iron the cap if the fabric allows. This removes dirt and relaxes creases.
- Mark the design placement with a fabric marker or chalk. Choose small areas first, such as the side panel or back of the cap, which are flatter and easier to stitch.
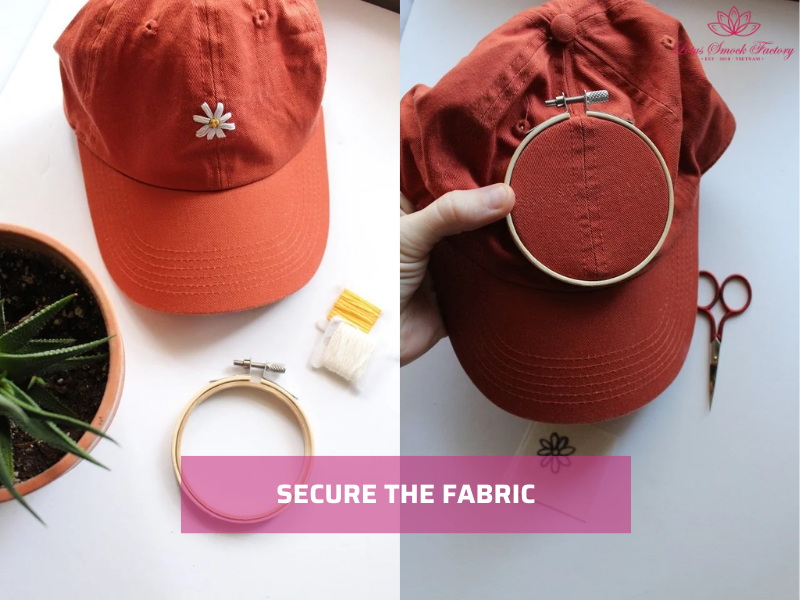
3.2. Step 2: Secure the Fabric
Then, you keep the fabric steady for the embroidery of the cap. Stabilising the crown prevents puckering and makes stitches hold better.
- Place a stabiliser under the crown before you stitch. A cut-away stabiliser works well for soft caps, while tear-away stabiliser suits structured caps. Cut a piece about 20 x 20 cm to cover the design area.
- If you are working on a bucket hat or knit cap, use a small hoop (10–12 cm) to keep the fabric taut.
- For baseball caps or snapbacks, where the crown does not fit in a hoop, work hoopless. Hold the fabric firm with your hand while the stabiliser supports the back.
3.3. Step 3: Choose Beginner Stitches
After that, you choose suitable stitches. Simple stitches give you control and are less likely to distort on curved surfaces.
- Backstitch: Perfect for outlines, borders, and lettering.
- Satin stitch: Good for filling letters, petals, or bold shapes.
- French knots: Add raised dots for accents, flower centers, or decorative borders.
You should use embroidery floss split into 2–3 strands for neat lines or the full 6 strands for bold work. Keep thread lengths short, around 30–40 cm, to avoid tangling.
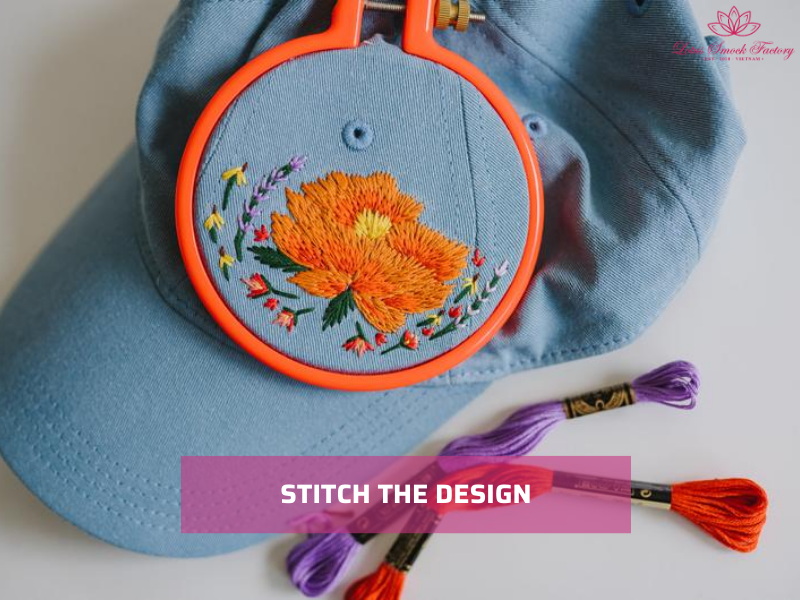
3.4. Step 4: Stitch the Design
Once you’ve chosen stitches, focus on technique. Working slowly and keeping tension balanced helps the embroidery sit neatly on the crown.
- Anchor the thread securely at the start. Use a double knot on the inside of the cap.
- Maintain even thread tension across the curved crown. Avoid pulling too tightly, which can cause puckering, or leaving stitches loose, which can make them sag.
- Work in small sections, checking the design often to keep the shape consistent.
3.5. Step 5: Finish the Inside Neatly
Lastly, you finish the embroidery, which keeps the cap comfortable to wear.
- On the inside of the crown, tie secure knots and weave the ends through nearby fabric loops. This prevents unraveling.
- For added comfort, especially on structured caps, cover the back of the embroidery with a piece of light interfacing or fabric. This smooths the inside and protects your head from rough threads.
- Trim extra thread close to the fabric for a neat look.
4. How to Embroider a Cap with a Machine (Step-by-Step)
Machine embroidery is the fastest way to customise caps with neat and consistent results. But the process takes practice because caps have curved crowns and stiff seams, but with the right setup you can achieve professional-quality designs.
Follow these five steps to embroider a cap with a machine.
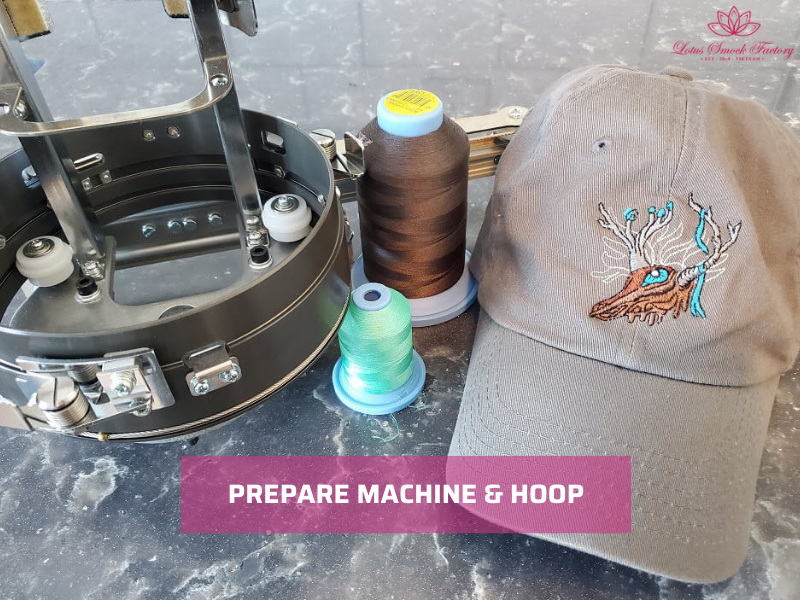
4.1. Step 1: Prepare Machine & Hoop
Set up your embroidery machine before starting.
- Attach a cap hoop or clamp system if your machine has one. These are designed to hold curved hats firmly in place.
- If you don’t have a specialty hoop, use a flat hoop for bucket hats or add an extra stabiliser for support.
- Insert a stabiliser under the embroidery area. Use a cut-away stabiliser for knit caps and a tear-away stabiliser for structured caps. This stops puckering and keeps the design stable during stitching.
4.2. Step 2: Position & Align Design
Then, you position the cap, which helps balance the design.
- Mark the center line on the cap using chalk or a fabric pen. This helps you align the design with the crown.
- Hoop the cap tightly to avoid shifting. The fabric should be snug but not overstretched. Check that seams are straight and the design area is flat inside the hoop.
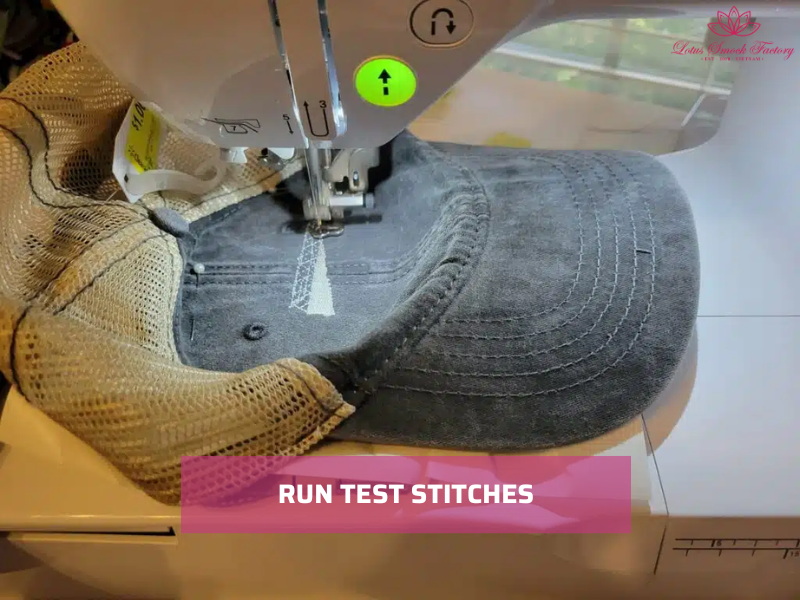
4.3. Step 3: Run Test Stitches
After positioning, you should run test stitches.
- Run a test stitch on scrap fabric or an old cap. This lets you check thread tension, colour, and stitch quality before using your final piece.
- Adjust stitch density to match the fabric. Structured caps often need lower density than softer beanies, so the design doesn’t become too stiff.
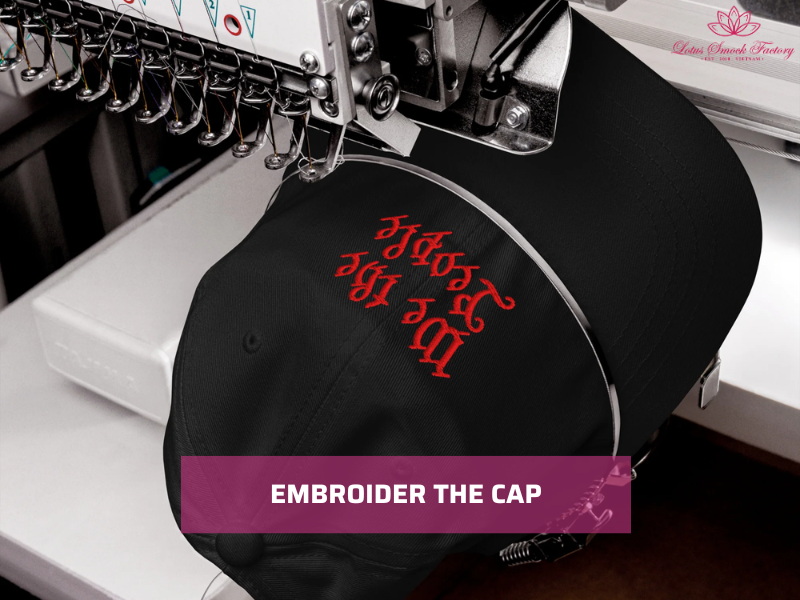
4.4. Step 4: Embroider the Cap
Now you can start stitching the final design.
- Begin at a slow speed to monitor fabric movement. This helps prevent puckering or thread breaks.
- Watch for jump stitches (extra connecting threads). Trim them as you go to keep the design neat and avoid tangling.
- Stay near the machine during the process so you can stop quickly if fabric shifts or the needle breaks.
4.5. Step 5: Clean Up & Press
Finishing makes the cap look professional and comfortable.
- Remove the hoop carefully and take off any excess stabiliser. Tear-away stabiliser can be removed around the edges, while cut-away stabiliser should be trimmed close to the stitches.
- Trim loose threads with small scissors. Check both the outside and inside of the crown.
- Place the cap face down on a towel and press lightly with a warm iron. Always use a pressing cloth between the stitches and iron to protect the design.
=>>>> Read more: How to Embroider Hats: A Complete Guide for Beginners
5. Common Mistakes When Embroidering a Cap (And Fixes)
When you learn how to embroider a cap, mistakes often happen because of the curved crown, stiff seams, or the wrong tools. Here are the most common problems and how you can fix them.
Fabric puckering
The fabric may wrinkle or gather around the stitches. This happens when the fabric is not supported enough.
⇒ To fix it, you use a cut-away stabiliser for knit caps or a tear-away stabiliser for structured caps. Adjust hoop tension so the fabric is firm but not overstretched.
Design off-center
A design that is too high, too low, or crooked can ruin the look of the cap. This usually comes from poor marking or rushing placement.
⇒ Fix it by measuring carefully before you start. You mark guidelines with chalk or a fabric pen to check alignment with seams and panels.
Broken needles
Needles often break when stitching through thick seams or when using the wrong size. Machine embroidery at high speed makes this problem worse.
⇒ You switch to heavy-duty or denim needles (size 90/14). For hand embroidery, you should use sharp embroidery needles that can handle thicker fabric layers.
Loose stitches
Stitches may sit unevenly or come undone after wear. This is often caused by weak knots or using thread that is too long.
⇒ You type secure knots at the start and end. Weave thread ends through nearby fabric loops. Then, you use shorter thread lengths (30–40 cm) to prevent tangling and sagging.
Expert Tip: Beginners should practice on an old cap before stitching on your final piece. Practicing helps you adjust stabiliser, thread tension, and design placement while getting used to the thickness and curve of the crown.
6. Creative Embroidery Design Ideas for Caps
Once you know how to embroider a cap, the next step is choosing the right design. Whether for personal use or business, embroidery can make a simple cap stand out. Here are some ideas to try.
Monograms & Initials
Monograms are timeless and easy to stitch. They work especially well on dad hats, which have softer crowns. A single letter on the front panel or initials on the side make thoughtful gifts. Use backstitch for outlines or satin stitch for bold letters.
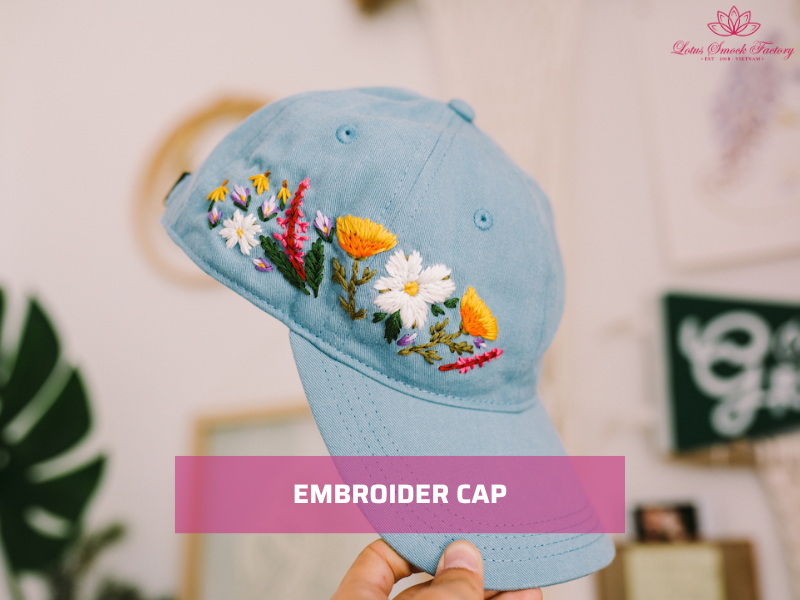
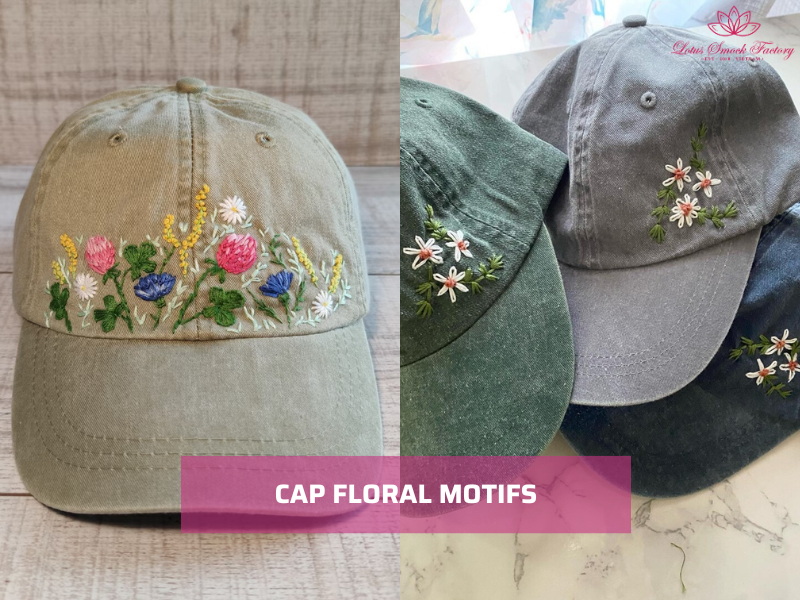
Floral Motifs
Flowers add colour and style to any cap. Small motifs look elegant on side panels or along the brim. Daisies, roses, and vines are simple but eye-catching choices.
For more guidance on floral designs, see our tutorial on how to embroider flowers.
Logos & Small Business Branding
For sellers, embroidery is a practical way to add branding to caps. Machine embroidery is best here because it gives consistent results across many items. Small logos on the front or side panels are popular for custom merchandise, especially for Etsy shops or local brands.
Fashion & Seasonal Projects
Seasonal designs make caps versatile. You can embroider snowflakes or Christmas trees on snapbacks, stitch summer borders on beach caps, or add festival slogans to create statement pieces. Denim caps and snapbacks are also great options for bold, fashion-focused embroidery.
7. FAQs About Cap Embroidery
7.1. Can you embroider a cap without a hoop?
Yes. You can embroider caps without a hoop, especially structured baseball caps or snapbacks where hoops don’t fit well. In this case, place stabiliser under the crown and hold the fabric taut by hand. For beanies or bucket hats, a small hoop (10–12 cm) gives more control.
7.2. What type of cap is easiest for beginners?
Soft caps like beanies or dad hats are easiest. Their fabric is flexible and fits into small hoops, making stitching simpler. Structured caps with stiff crowns are more advanced and require stabiliser and careful placement.
7.3. Do you need stabiliser for every design?
Yes, stabiliser is recommended for almost all cap embroidery. It prevents puckering, stretching, and shifting during stitching. Use cut-away stabiliser for knit caps and tear-away stabiliser for structured caps. Skipping stabiliser often leads to uneven stitches and loose designs.
7.4. Can you machine embroider structured snapbacks?
Yes, but you need the right setup. Use a cap hoop or clamp system to hold the crown firmly. Add tear-away stabiliser under the design area and reduce machine speed to avoid needle breaks. Test stitches on scrap fabric first to adjust tension and density.
7.5. How durable is embroidery on caps after washing?
Embroidery on caps is durable when stitched with quality thread and secured properly. Wash caps by hand or on a gentle machine cycle inside a mesh bag. Always air dry to protect stitches. With proper care, embroidery can last for years without fading or loosening.
8. Final Words
Embroidery turns a cap into more special. After learning how to embroider a cap, you can create initials, logos, or floral motifs that make every piece stand out. The key is to use the right tools, mark placement carefully, and practice simple stitches before trying complex designs.
Whether you want a personal gift or a product to sell, embroidery adds value without high cost. Choose a cap, set up your tools, and begin your project today.
Lotus Smock is a brand of TAQ SERVICE TRADING DEVELOPMENT JSC. In clothing business, we’ve been crafting unique pieces for the domestic market since 2010. We prioritize the quality, so we don’t accept overly big orders. We are committed to producing high-quality products at the best prices. Recently, we have started engaging in social media and marketing to reach international customers, bringing the best products from Vietnam to friends around the world.
Contact Lotus Smock at:
- Facebook: facebook.com/lotussmockfactory
- WhatsApp: +84 83 333 3498
- Youtube: youtube.com/@LotusSmockFactory