How to Embroider Beads on Fabric with 5 Easy Steps
Bead embroidery is a simple way to add sparkle and detail to fabric. However, beginners often face loose beads, uneven lines, or thread showing, but the method is easier than it looks. You only need basic tools like fabric, beads, thread, and a needle. With the right steps, you can personalize and create borders, flowers, monograms, or full patterns for your clothes.
If you want to know how to embroider beads, keep reading this guide to learn easy techniques, common mistakes, and expert tips so your beadwork looks neat and strong.
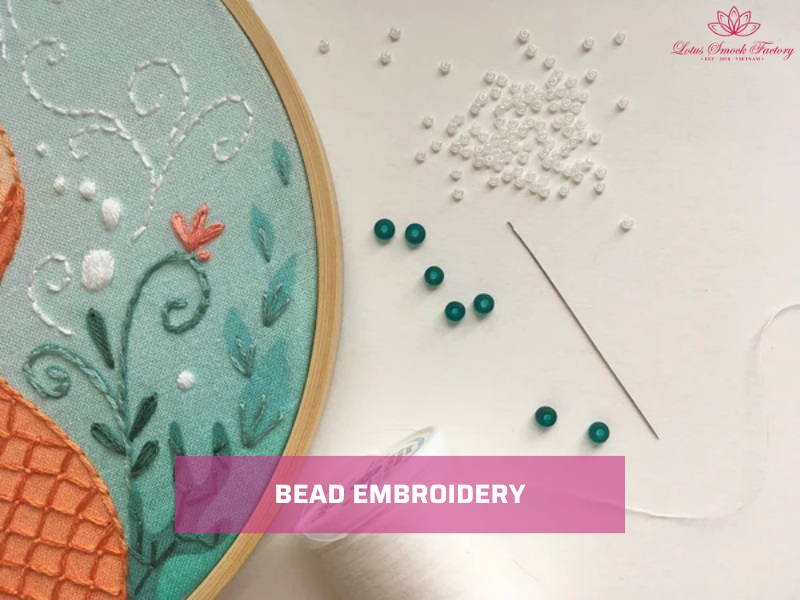
1. What Is Bead Embroidery?
Bead embroidery is a decorative method where you sew beads directly onto fabric to form patterns or accents. In simple words, bead embroidery is stitching beads onto fabric for decoration. The technique combines basic embroidery stitches with beads to create texture and shine.
You can use bead embroidery in many ways:
- Floral embroidery: Add beaded centers to flowers or stitch petals with bead outlines.
- Borders: Decorate hems, cuffs, or collars with lines of beads.
- Monograms: Place initials on napkins, towels, or clothing.
- Embellishments: Enhance denim jackets, handbags, or cushion covers with beaded motifs.
Bead embroidery is not the same as sequin embroidery. Beads are round or tube-shaped and give texture and dimension. Sequins are flat discs that reflect light but lie closer to the surface. Both methods decorate fabric, but beads create more depth and weight, while sequins give shine and coverage.
Why should you learn bead embroidery? Learning how to embroider beads is practical for both fashion and craft projects. Beads can add texture, sparkle, and style to clothes, accessories, and decorative items. Therefore, with simple stitches, you can turn plain material into fabric that feels personal and creative.
2. Tools & Materials You Need for Bead Embroidery
Having the right tools makes bead embroidery smoother and more durable. The table below shows the essentials for fabric, beads, thread, and extras.
| Category | Options & Details | Notes / Amount |
| Fabric & Stabiliser | – Cotton, linen, denim (stable weaves). – Avoid stretchy knits or delicate silks (beads sag).
– Cut-away stabiliser for stretch fabrics. – Fusible stabiliser for light fabrics. |
Start with a 30 × 30 cm fabric sample for practice. Use 1 layer of stabiliser under each design area. |
| Beads & Thread | – Seed beads (size 11/0 or 8/0). – Bugle beads (3–5 mm).
– Small crystals for sparkle. – Embroidery floss (cotton, 6-strand). – Nylon or polyester beading thread for strength. |
For beginners, buy 10–20 g packs of seed beads in 2–3 colors. Use short thread lengths (30–40 cm) to avoid tangling. |
| Needles & Extras | – Beading needles (size 10–12, thin enough for small beads).
– Embroidery scissors for trimming. – Fabric markers or water-soluble pens. – Small hoop (10–15 cm). – Thimble (optional, for thick fabrics). |
Keep at least 2–3 needles on hand (they bend easily). A 10 cm hoop is enough for most small projects. |
3. Step-by-Step: How to Embroider Beads
Learning how to embroider beads is easier when you follow each step carefully. Start with simple designs and practice on scrap fabric before moving to clothes or accessories. Below are five steps to guide you from preparation to a finished beaded pattern.
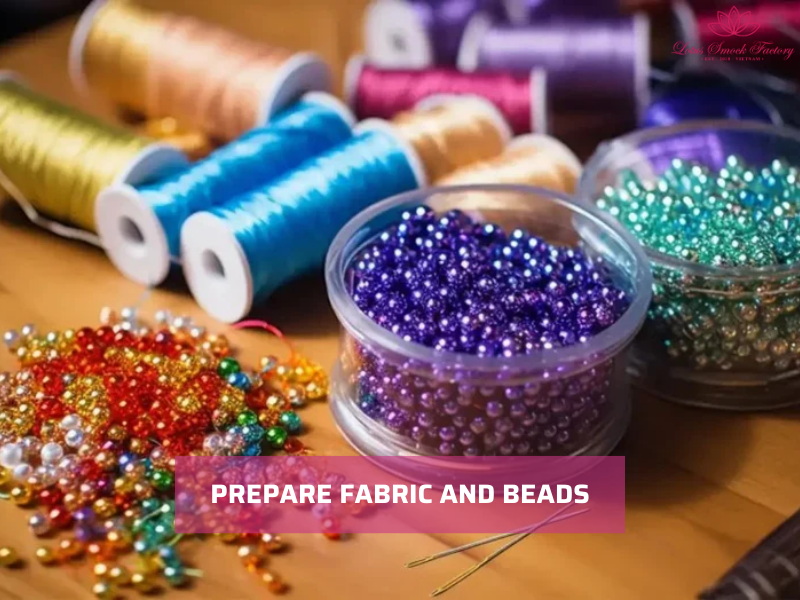
3.1. Step 1: Prepare Fabric
First, preparation makes beadwork neater and more durable.
- Wash the fabric first. This removes any finish or dirt that may weaken the thread or cause shrinking later.
- Iron the fabric flat. Wrinkles can distort your design and make beads sit unevenly.
- Add a stabiliser under the fabric. Use a cut-away for stretch materials or fusible stabiliser for light fabrics. The stabiliser supports stitches and prevents puckering.
- Mark your design with a water-soluble pen or chalk pencil. Simple dots or lines are enough as a guide. You do not use permanent ink because it may show through transparent beads.
When the fabric is clean, flat, and stable, you can start stitching without worrying about distortion.
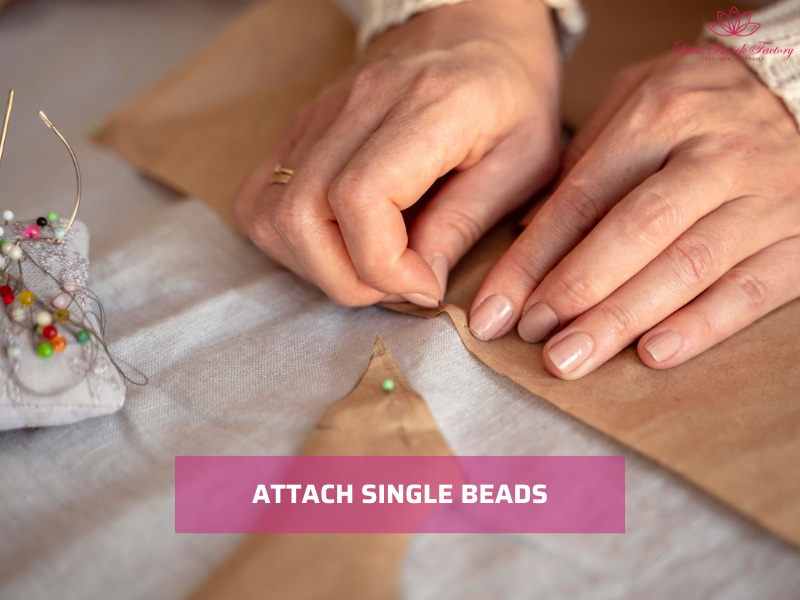
3.2. Step 2: Attach Single Beads
Single beads are the simplest way to add sparkle. They work well for accents, dots, or scattered highlights.
- Bring the needle up from the back of the fabric.
- Slide one bead onto the thread.
- Push the needle back down right next to where it came up.
- To secure it, you use a tiny backstitch under the bead. This holds it in place firmly.
Single beads are quick to sew and give a light touch of shine. They are often used to highlight embroidery letters or small flower petals.
3.3. Step 3: Stitch Beads in a Line
Lines of beads are common in borders, outlines, or lettering. The method keeps beads straight and evenly spaced.
- Bring the needle up, then string 3–4 beads.
- Lay the beads flat along your marked line.
- Insert the needle back into the fabric at the end of the group.
- Come up between beads and tack them down one by one. This keeps the line firm and prevents gaps.
Lines work well for hems, cuffs, or decorative outlines on monograms. Beginners should practice straight lines first before trying curves.

3.4. Step 4: Create Bead Clusters
After stitching beads, you start creating bead clusters. Clusters add texture and depth. They are ideal for floral designs or filling small areas with sparkle. There are two method, including:
- One method is to use a French knot with a bead. Wrap the thread once around the needle, add a bead, and pull through. This creates a raised knot with a bead in the center.
- Another method is to stitch several beads in a small circle. Bring the needle up close to the first bead, add another, and repeat until the circle is full.
Clusters work well for flower centers, decorative stars, or small motifs. They make designs stand out without using too many beads.
3.5. Step 5: Fill Shapes with Beads
When you want full coverage, use rows of beads to fill an area. This technique requires patience but gives strong results.
- Outline the shape first with backstitch.
- Bring the needle up, string a row of beads, and lay them across the area.
- Tack each bead or every second bead down to keep the row flat.
- Continue row by row until the shape is filled.
Keep thread tension steady. If you pull too tight, beads may curve and distort. If you leave the thread loose, beads may sag or catch during wear.
Pro Tip: You always secure thread with double knots at the start and end. This prevents beads from loosening or falling off after washing.
4. Common Mistakes in Bead Embroidery (And How to Fix Them)
Even simple bead embroidery can go wrong if you skip small details. Below are the most common mistakes and how you can fix them.
Beads falling off
Loose beads are the biggest frustration for beginners. They slip out of place or drop after a few washes. This happens when the thread is not secured or when you use only a single strand.
⇒ You fix it by knotting the thread securely at the start and end. Use doubled floss or nylon beading thread for a stronger hold.
Uneven lines
Beads may bend, curve, or spread apart, making borders look messy. This usually comes from poor spacing or rushing without a guide.
⇒ You should mark the fabric with guide dots or lines before stitching. Tack down beads in the middle of each group to keep them straight.
Thread showing
Sometimes the thread is more visible than the beads, especially with transparent or light-colored beads. This can distract from the design.
⇒ You match the thread color to your beads or fabric. Use shorter stitches so the thread stays hidden under the beads.
Fabric puckering
Thin fabrics often wrinkle or pucker around beads. Without support, stitches pull the fabric together.
⇒ Fix it by adding a stabiliser under the fabric. Cut-away or fusible stabilisers keep the surface flat and prevent distortion.
5. Creative Ways to Use Bead Embroidery
Bead embroidery is more than decoration. It can adds shine, texture, and depth to simple fabrics. Once you learn the basics, you can apply them to many creative projects.
Floral Embroidery with Beads
Flowers look striking when combined with beads. You can stitch rose centers with clusters of round beads or create petals with lines of bugle beads. Small seed beads also work for lavender stalks or daisy outlines. Beads bring natural sparkle to floral motifs and make them stand out on both clothes and accessories.
If you want more ideas for flowers, read our guide on how to embroider flowers.

Fashion & Accessories
In addtion, Bead embroidery is a quick way to update everyday items. You can add borders on cuffs, collars, or handbags. Small motifs also look elegant on denim jackets or sweatshirts. The raised surface of beads turns simple garments into fashion statements.
To try it on thick clothing, see our tutorial on how to embroider a sweatshirt.
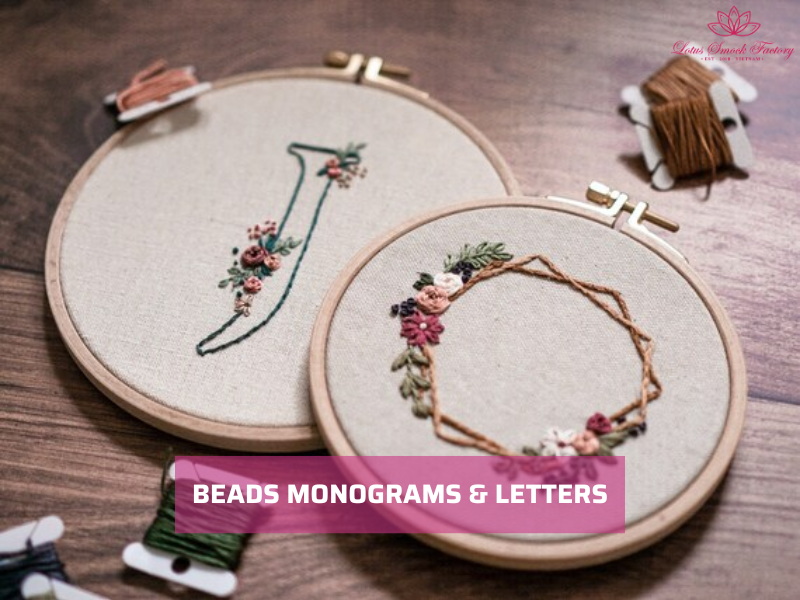
Monograms & Letters
Monograms gain extra value when outlined or filled with beads. You can add initials to napkins, towels, or clothes to make them personal. Pair satin stitch outlines with beads inside the letters for a bold design. This style works well for gifts and adds a premium touch to boutique clothing.
Check the details of how to embroider letters.
Home Décor & Crafts
Beads also work in home projects. You can stitch them on cushion covers, wall art, or framed embroidery. They add dimension to plain fabrics and make décor more eye-catching. DIY patches with beadwork are another option. Stitch a design on a fabric square, cut it out, and attach it to bags or jackets. This is a flexible way to test designs before sewing directly onto fabric.
6. Caring for Bead Embroidery
Bead embroidery looks delicate, but you can keep it strong with the right care. Washing, drying, and pressing need extra attention so beads stay secure and fabric does not stretch.
- Hand wash or gentle cycle
The safest way is to hand wash in cold water with mild soap. If you use a washing machine, place the item inside a mesh laundry bag and select a gentle cycle. This reduces friction and protects both the beads and the thread. - Avoid bleach and harsh detergents
Bleach and strong cleaners weaken fabric and damage thread. They also dull the shine of beads, especially glass or coated types. Stick to mild detergent and rinse well to keep colors bright. - Air dry flat
Do not twist or wring out bead embroidery. You lay the fabric flat on a clean towel and let it dry naturally. Hanging may stretch the design, and high heat from a dryer can loosen stitches. - Press from the back with a cloth barrier
If you need to iron, place the embroidery face down on a towel. Use medium heat and add a thin cotton cloth between the fabric and iron. This prevents beads from cracking and keeps stitches raised.
Expert Tip
For clothes, secure large beaded areas with a whip stitch around the edges. This adds extra support and can increase durability by up to 50%. It is especially useful for garments that you wash often, such as jackets or shirts with heavy beadwork.
7. FAQs
7.1. What thread is best for bead embroidery?
You can use cotton embroidery floss, nylon beading thread, or polyester thread. Nylon and polyester are stronger and resist fraying, which makes them better for heavy projects or clothes that will be washed often. For small designs, cotton floss works well and is easier for beginners.
7.2. Can you embroider beads on stretch fabric?
Yes, but it is harder to keep beads in place. Stretch fabric pulls under the weight of beads, which can cause sagging. Always add a cut-away stabiliser on the back to stop stretching. Choose lighter beads and keep designs small for best results.
7.3. How do you stop beads from coming loose?
Start and end every thread with a double knot. Use short thread lengths (30–40 cm) to reduce tension problems. For large bead areas, add a whip stitch around the edges to keep them secure.
7.4. What is the easiest bead embroidery stitch for beginners?
The single-bead backstitch is the simplest. You bring the needle up, slide one bead, and tack it down with a small stitch. It is easy to control and good for accents or simple dots. Once you are confident, you can try lines or clusters.
7.5. Can bead embroidery be machine washed?
Yes, but always with care. Place the item in a mesh laundry bag and use a gentle cycle with cold water. Avoid bleach and strong detergents. For delicate items, hand washing is safer. Air dry flat instead of using a dryer.
8. Final Words
Now you know the basics of how to embroider beads step by step. With simple stitches and the right materials, you can turn plain fabric into something bright and textured. Remember to secure threads, add stabiliser when needed, and test designs on scrap fabric first. Bead embroidery works on clothes, accessories, and home décor. Start small with a line of seed beads or a flower center, then move to bigger projects today.
Lotus Smock is a brand of TAQ SERVICE TRADING DEVELOPMENT JSC. In clothing business, we’ve been crafting unique pieces for the domestic market since 2010. We prioritize the quality, so we don’t accept overly big orders. We are committed to producing high-quality products at the best prices. Recently, we have started engaging in social media and marketing to reach international customers, bringing the best products from Vietnam to friends around the world.
Contact Lotus Smock at:
- Facebook: facebook.com/lotussmockfactory
- WhatsApp: +84 83 333 3498
- Youtube: youtube.com/@LotusSmockFactory