How to Blanket Stitch: A Complete Beginner’s Guide
The blanket stitch is a simple hand stitch that finishes the raw edge of fabric and adds a decorative touch. If you want to know how to blanket stitch, think of it as looping thread evenly along the edge to stop fraying and create a clean border. People often use it on blankets, appliqué designs, felt crafts, and even clothing repairs. You only need a needle, thread, and fabric to get started, which makes it easy for beginners.
In this guide, we will learn each step clearly, from preparing fabric to stitching around corners. You will also see tips to avoid mistakes and ideas for creative use. Keep reading to start stitching like a pro.
1. What is a Blanket Stitch?
The blanket stitch is a simple hand stitch used to finish the raw edges of fabric. You make it by looping the thread evenly along the edge of the fabric. This creates a neat border that keeps fabric from fraying while also adding a handmade detail. If you want to learn how to blanket stitch, start with small projects like felt or cotton scraps.
You can use blanket stitch in many ways:
- Securing appliqué edges on quilts, clothing, or accessories
- Hemming blankets and fleece throws to stop wear
- Adding a border on embroidery projects or home décor pieces
The stitch has several benefits. It prevents fraying, looks tidy, and adds handmade charm to everyday items. It also works well on felt, fleece, wool, and denim. Therefore, blanket stitch is a versatile choice for crafters.
After many people start with blanket stitch, they often move on to related techniques, such as how to embroider letters or embroidery flowers. These skills help you combine decorative stitching with more advanced embroidery work.
2. Tools & Materials You Need Before You Start
Before you begin learning how to blanket stitch, you should prepare the right tools. Good materials make your stitches smoother and your finished edge look professional.
2.1. Fabric Choices
You should choose some types of fabric below for your creative project, including:
- Felt and fleece: Great for beginners because they do not fray easily.
- Wool: Strong and warm, often used for blankets and coats.
- Cotton: Light and versatile, it works well for practice and small projects.
Avoid thin sheer fabrics or very stretchy knits at the start, as they make it harder to keep your stitches even.

2.2. Thread Options
You should also choose thread options below to achieve the best stitching project results, including:
- Embroidery floss: Soft, colorful, and decorative. Ideal if you want a visible edge.
- Strong sewing thread: Best for functional work, such as hemming heavy blankets. Always match the thread thickness to the weight of your fabric so the stitches sit flat and balanced.
2.3. Other Materials
After you select the fabric and threads option, continue to select the materials below:
- Needles: Choose a sharp embroidery or crewel needle in a size that suits your fabric. A larger eye makes threading embroidery floss easier, while a smaller needle works better with fine cotton.
- Extra supplies: Keep a small pair of scissors for trimming, a fabric marker or chalk for guides, and a ruler to measure spacing. An embroidery hoop is optional, but it helps keep the fabric flat and the tension even.
Pro tip: We recommend always testing your thread on a scrap piece of fabric first. You will see if the thickness looks right and avoid mistakes on your final project.
Many people who practice blanket stitch later use the same tools when practicing how to embroider a sweatshirt or even when experimenting with how to embroider on denim.
3. Step-by-Step: How to Blanket Stitch by Hand
Learning how to blanket stitch is simple once you break it into small steps. This method helps you secure raw edges neatly and add a decorative border. Follow the guide below for clean and even results.
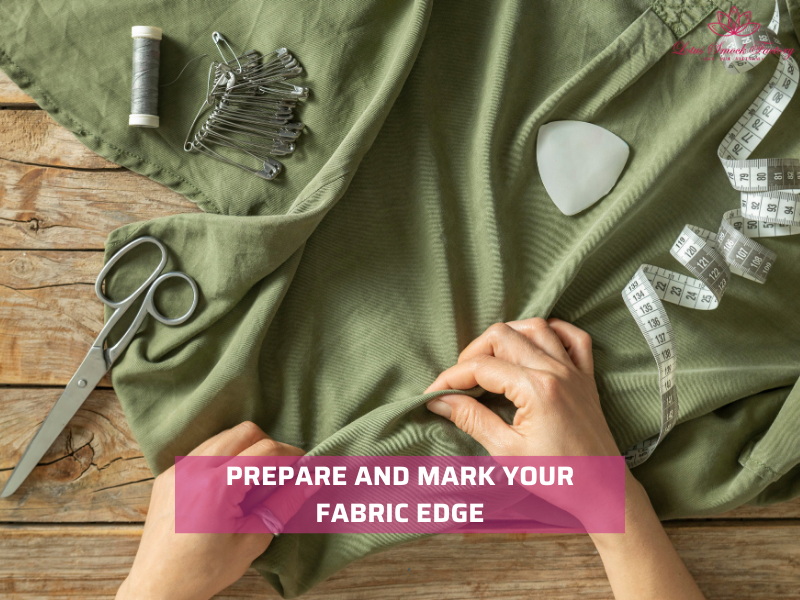
3.1. Step 1: Prepare and Mark Your Fabric Edge
Start with a clean edge so your stitches sit evenly.
- Trim any frayed or loose threads with sharp scissors.
- If your fabric unravels easily, press the edge flat before you begin.
- For beginners, lightly draw a guideline with a fabric marker or ruler to keep your stitch spacing consistent.
3.2. Step 2: Thread the Needle and Secure the Starting Point
Using the right setup makes stitching smoother.
- Cut a length of embroidery floss about 45–60 cm long. This length avoids tangling while giving you enough thread to work with.
- Tie a small knot at one end of the floss.
- Insert the needle from the back of the fabric to the front, close to the edge. The knot will stay hidden on the reverse side.
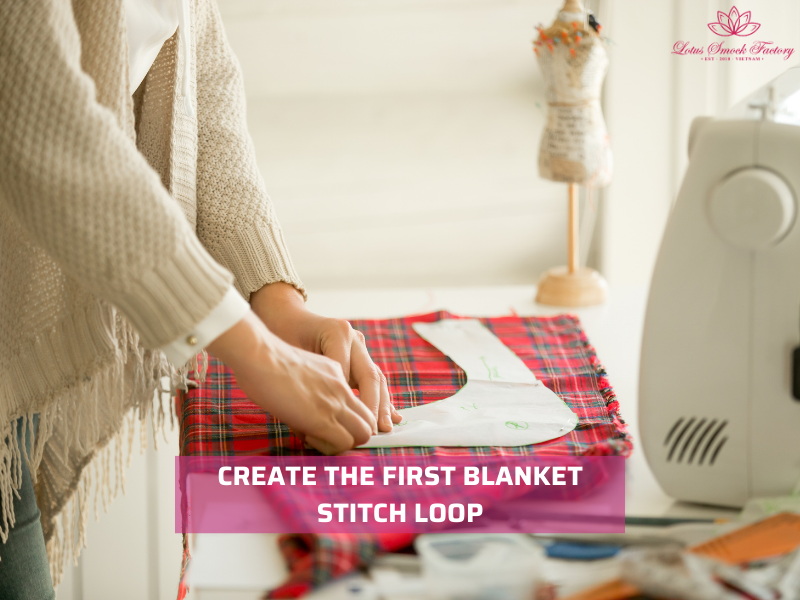
3.3. Step 3: Create the First Blanket Stitch Loop
This first loop anchors your stitches.
- Bring the needle through the fabric edge about 3–5 mm in from the corner.
- Before pulling the thread tight, pass the needle under the loop of thread.
- Gently pull until the loop forms a neat line along the fabric edge. Keep the loop size even; not too loose, not too tight.
3.4. Step 4: Continue Stitching Along the Edge
Consistency is key for a neat finish.
- Insert the needle at equal intervals, usually 3–5 mm apart for most fabrics.
- Each time, pass the thread under the needle before pulling tight.
- Keep the stitch tension even. Pull too hard and the fabric may pucker; leave it too loose and the edge will look messy. Work slowly at first to build rhythm.
3.5. Step 5: Finishing the Last Stitch
End your stitching cleanly so it looks polished.
- At the final stitch, make a small loop and pass the needle through it twice to secure the thread.
- Pull firmly but gently to avoid bulky knots.
- Slip the needle under the last few stitches on the back of the fabric before trimming the tail short. This hides the end and keeps the border smooth.
4. How to Blanket Stitch Around Corners and Curves
Blanket stitch works best on straight edges, but with a little adjustment, you can also stitch neatly around corners and curves. This makes it useful for appliqué, round patches, and decorative borders.
4.1. Blanket Stitch on Corners
When you reach a corner, you need to turn the stitch smoothly so there are no gaps.
- As you approach the corner, place one stitch right at the edge of the turn.
- Pivot your fabric slightly and bring the needle up again on the new side.
- Add an extra stitch at the very corner point. This fills the gap and keeps the line continuous.
- Continue stitching along the next edge as normal.
Example: When finishing a square appliqué, that extra corner stitch helps the thread wrap neatly and prevents uneven spacing.
4.2. Blanket Stitch on Curves
Curved edges need shorter stitches to follow the round shape.
- Make your stitches closer together, around 2–3 mm apart, especially on tight curves.
- Keep the loop height consistent to avoid wavy lines.
- For wide, gentle curves, you can keep the spacing at 3–5 mm.
- Hold the fabric taut in an embroidery hoop. This prevents puckering when following the curve.
Example: When learning how to embroider flowers, curved petals look more polished if you shorten the stitch spacing around the bends.
5. Creative Ways to Use Blanket Stitch in Sewing & Embroidery
Blanket stitch is more than just a way to finish edges. It can also be a design feature in many sewing and embroidery projects. Because it is strong and decorative, you can use it both for function and style.

5.1. Appliqué Edges
Blanket stitch is one of the most popular stitches for appliqué. It secures fabric shapes on quilts, T-shirts, or jackets while adding a neat outline.
- Place the appliqué piece on the base fabric and pin it in place.
- Use blanket stitch around the edge so the fabric does not fray.
- Try contrasting thread for a bold outline or matching thread for a subtle finish.
This is a great method if you also want to practice embroidery letters or stitched motifs on clothing.
5.2. Decorative Borders
Blanket stitch makes a clean border on items that need both strength and detail.
- Use it on table linens, napkins, handkerchiefs, or baby blankets.
- Keep the stitches evenly spaced (3–5 mm apart) for a tidy look.
- Try different thread colors to match or contrast with your fabric.
5.3. Repair Work
You can also use blanket stitch for visible mending. Instead of hiding a tear or worn spot, you highlight it with colorful stitching.
- Patch holes in jeans or bags with a fabric piece, then blanket stitch around it.
- This adds strength and turns a repair into a design element.
If you enjoy denim projects, learning how to embroider on denim pairs perfectly with this technique.
5.4. Craft Projects
Blanket stitch is a favorite for small handmade crafts.
- Use it to stitch felt ornaments, plush toys, or keychains.
- It keeps layers together while giving a decorative edge.
- Works well with felt and fleece, since these fabrics don’t fray easily.
Blanket stitch is simple but very versatile. Once you practice the basics, you can apply them in many creative projects at home.
6. Common Mistakes and How to Avoid Them
During the process of sewing a blanket, you may encounter the following errors. Follow along to learn how to fix them.
Uneven stitch spacing
It is a mistake many beginners make because the distance between stitches is not consistent. To correct the mistake, you can do these things:
- Mark guide dots along the edge with a ruler or fabric marker.
- Practice on scrap fabric to build a steady rhythm.
Loose or too-tight loops
Loose loops don’t sit flat, while tight loops pull the fabric and cause puckering. To correct the mistake, you can do these things:
- Pull the thread gently until it rests snugly on the fabric edge.
- Keep your hand tension even throughout the stitching process.
Thread fraying
The thread frays when using long strands of floss. To correct the mistake, you can do these things:
- Use strong embroidery floss or sewing thread.
- Cut thread lengths of 40–50 cm to reduce tangling.
- Wax the thread lightly to protect it from fraying.
7. FAQs
7.1. Can you do blanket stitch on a sewing machine?
Yes, some sewing machines offer a blanket stitch setting. It creates a similar edge finish but is faster than hand sewing. However, hand stitching gives you more control on curved shapes, appliqué, and small projects.
7.2. How do you keep stitches even without marking?
You can keep your stitches even by watching the space between each entry point. To correct uneven spacing:
- Use the width of your needle as a guide.
- Keep your hand steady and slow down your stitching rhythm.
- Practice on felt or cotton before working on your main piece.
7.3. What’s the best thread for heavy fabrics?
For fabrics like denim, canvas, or wool, regular embroidery floss can break. To correct this problem:
- Choose a thicker thread, such as pearl cotton or strong polyester thread.
- Match the needle size to the thicker thread to avoid tearing the fabric.
8. Final Words
Learning how to blanket stitch gives you a skill you can use for sewing, embroidery, and crafts. The stitch protects fabric edges, adds detail, and works on many materials like felt, denim, or fleece. With a bit of practice, you will make even stitches and clean borders. Try it first on scrap fabric, then move on to blankets, appliqué, or clothing repairs. Remember to keep spacing even and thread tension steady.
Once you know the basics, you can use blanket stitch for both practical and creative projects. Start today and give your fabric a handmade finish.
Lotus Smock is a brand of TAQ SERVICE TRADING DEVELOPMENT JSC. In clothing business, we’ve been crafting unique pieces for the domestic market since 2010. We prioritize the quality, so we don’t accept overly big orders. We are committed to producing high-quality products at the best prices. Recently, we have started engaging in social media and marketing to reach international customers, bringing the best products from Vietnam to friends around the world.
Contact Lotus Smock at:
- Facebook: facebook.com/lotussmockfactory
- WhatsApp: +84 83 333 3498
- Youtube: youtube.com/@LotusSmockFactory